

This blog is for setting up our QuickBooks Online Integration. You can also read the troubleshooting guide for this integration or check out the tutorial for our QuickBooks Desktop Integration.
1. Connecting to QuickBooks
To start, we need to connect EZRentOut with QuickBooks Online.
1. From your EZRentOut account, head to Settings → Add Ons → Integrate QuickBooks Online
2. Click the connect button.

3. The Intuit App Center pop-up will appear. To ‘authorize Intuit to securely share your data to EZRentOut’, hit the Authorize button. This will connect EZRentOut and QuickBooks.
Note: This process is much quicker if you sign into QuickBooks before attempting this step.
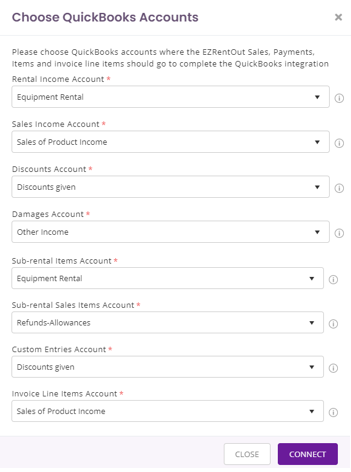
4. After signing in, specify the Chart of Accounts for Sales, Payments, and Items.
5. The next step is syncing your taxes.
Before you start, it is important to know how to handle Manual Sales Tax and Automated Sales Tax in QuickBooks.
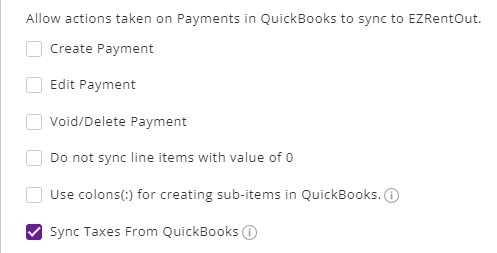
Next, go to Settings → Add Ons → Integrate Quickbooks Online → Sync Taxes From QuickBooks and select this checkbox.
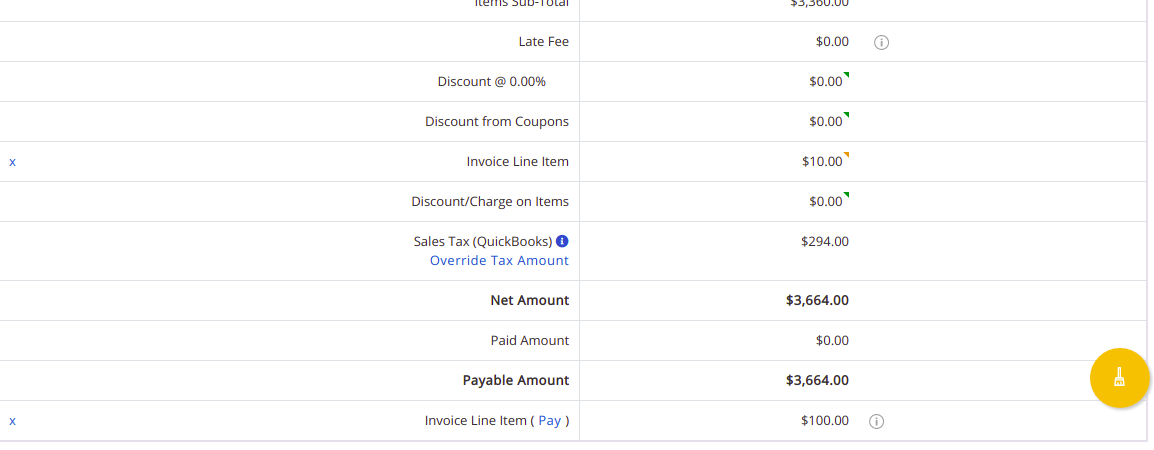
This causes customer invoices to sync, pulling the tax from QuickBooks to EZRentOut. If changes are made to the Order, you will be shown a message to sync the taxes again to update the rate manually:
You can do this using the ‘Sync Taxes from QuickBooks’ button under the More Option to the right of the Order:
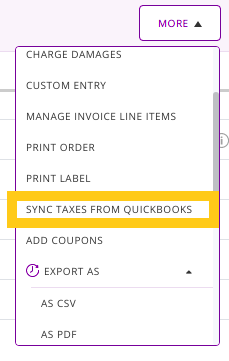
Please note that this manual sync will delete all taxes applied to the Order within EZRentOut, and sync the tax over from QuickBooks. The Order will then be synced directly to QuickBooks.
2. How things map
EZRentOut manages rental and sale transactions through Orders. An Order can go through various stages and is always associated with a customer. There is also an invoice attached to an Order. You charge payments, apply taxes, add discounts, give refunds, etc. in Orders.
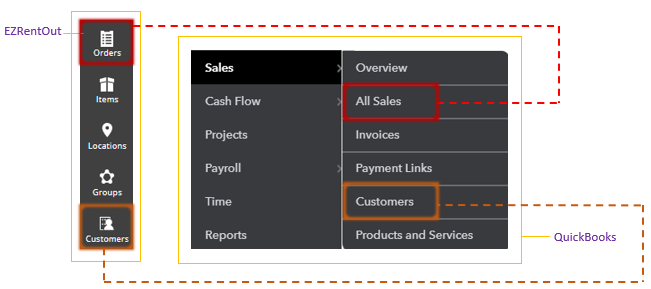
This is how mapping works from EZRentOut to QuickBooks:
| EZRentOut | QuickBooks | Location in QuickBooks |
| Items | Services | Settings icon → Products and Services |
| Orders | Invoices | Side panel → Sales → All Sales |
| Customers | Customers | Side panel → Sales → Customers |
| Payments | Payments | Create → Recieve Payment |
You can run reports on payments, finances, orders, customers, etc. from EZRentOut → More → Reports or from QuickBooks → Reports.
A more in-depth guide to mapping is given below:
| EZRentOut | QuickBooks Online |
| Business | Customers |
| Customers | Customers |
| Payments | Payments |
| Customer/Business’ Billing Address | Invoice Billing Address |
| Custom Tax | Custom Tax |
| Custom Entries | Service Item |
| Discounts | Service Item |
| Default Line Items | Service Item |
| Default Line Items in an Order | Service Item |
| Items (Assets, Asset Stock, Inventory) | Service Item |
| Late fee | Service Item |
| Orders | Invoices |
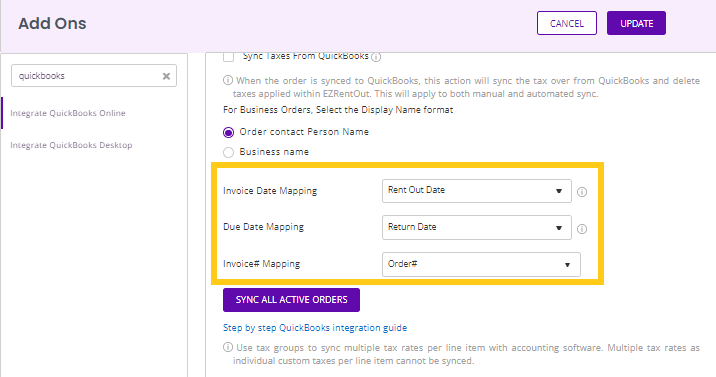
You can also map the Invoice Date, Due Date, and Invoice Number per your requirements
Note: Default Line Items that are not present within an Order are synced as Service Items with their new Invoice.
3. Importing Customers
Once you enable the QuickBooks Add-On in EZRentOut, a new field will appear against all your customers. This is the QuickBooks Display Name (Side Panel → Sales → Customer → Edit). All QuickBooks Display Names are unique. This is the customer identity that maps from EZRentOut to QuickBooks and vice versa.
Let’s begin importing customers from QuickBooks Online!
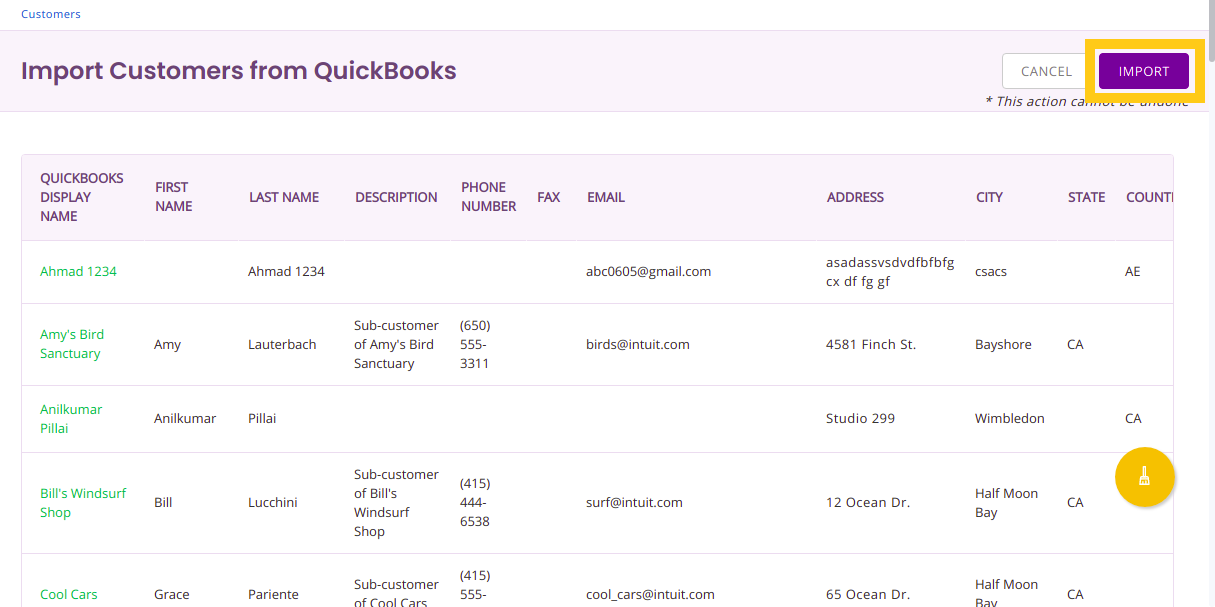
Go to the Customers tab in EZRentOut. Click on the ‘Import From QuickBooks’ button.

This redirects you to a page displaying all the QuickBooks Online Customers that are going to be imported. Hit the ‘Import’ button and that’s it!
Additionally, whenever you rent out an Order in EZRentOut, a new customer is automatically created in QuickBooks if they don’t already exist. Customer details and payments are synced whenever the relevant transactions are synced.
Note: If you haven’t filled in a Display Name for a customer in EZRentOut, the field is auto-filled with the customer’s first and last name, before sync.
4. Importing Orders
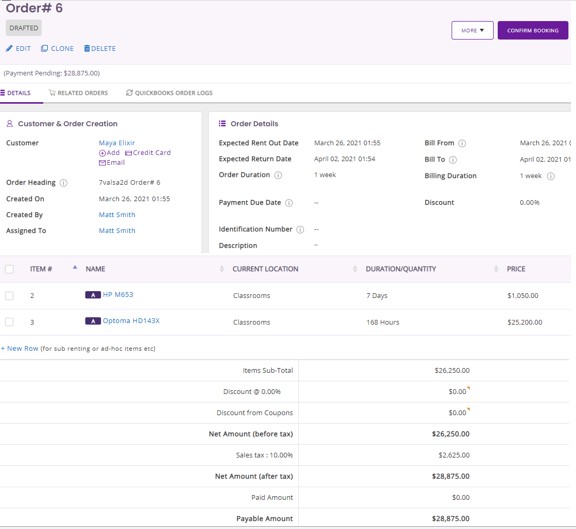

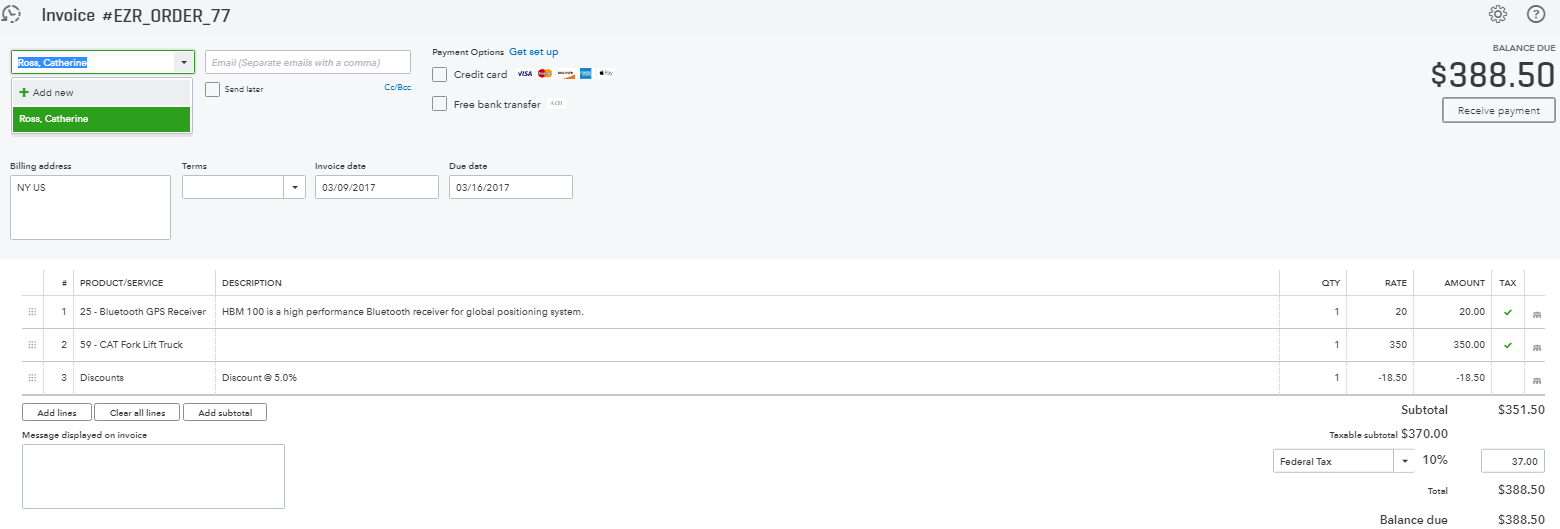

Let’s begin with an Order in EZRentOut. This Order invoice will appear in QuickBooks once it’s rented out so let’s go ahead and rent it out. The invoice will appear under ‘All Sales’ in QuickBooks → Side Panel → Sales. The above is an open invoice (not paid) until the Order is completed in EZRentOut. The EZRentOut Order is added as a QuickBooks transaction. Customer, their address, rent out and due dates also appear here:
From QuickBooks → Side Panel → Sales → Customers, you can see that ‘Catherine Ross’ has been added here:
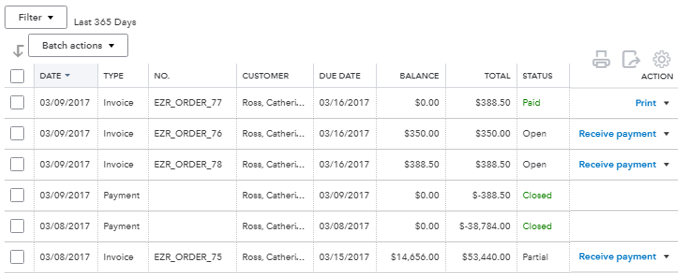
When you charge the payment for an order in EZRentOut, the invoice is marked as ‘Partial’ if payment isn’t made in full. Once, you return/complete the Order, or charge payment in full, the invoice is marked “Paid” in QuickBooks. A payment transaction is also added with “closed” status:
5. Actions that prompt Order details to sync
Order information syncs from EZRentOut to QuickBooks and vice versa if any of the following actions are taken:
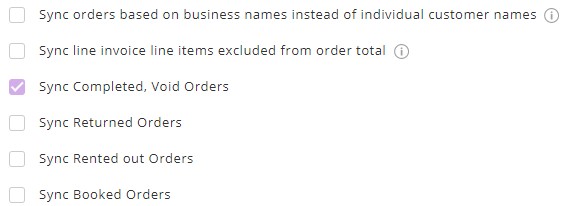
- Order is rented out or booked in EZRentOut, provided your QuickBooks Add On preferences allow for these syncs. Update them from Settings –> Add Ons –> Integrate with QuickBooks Online in EZRentOut.
- The invoice is marked Paid in QuickBooks.
- When a Booked Order is canceled in EZRentOut, its invoice is deleted in QuickBooks.
- Whenever you press the ‘Sync Invoice with QuickBooks’ button from the EZRentOut Order Details page, all updates are synced to QuickBooks. This button becomes available once an Order is rented out/booked(based on the settings enabled).
- Any payment made in either QuickBooks or EZRentOut prompts a sync to the other application. However, other details such as invoices, customers, or taxes are only pushed from EZRentOut to QuickBooks, not the other way around.
Note: For a payment to sync both ways, an Order’s invoice must exist in your EZRentOut account.
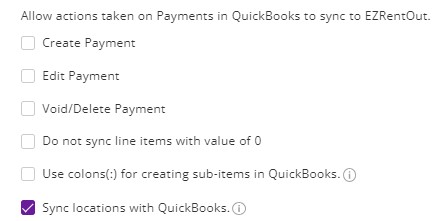
6. Sync Order locations to QuickBooks location
Go to Settings → Add Ons → Integrate Quickbooks Online → Sync locations with QuickBooks and select this checkbox.
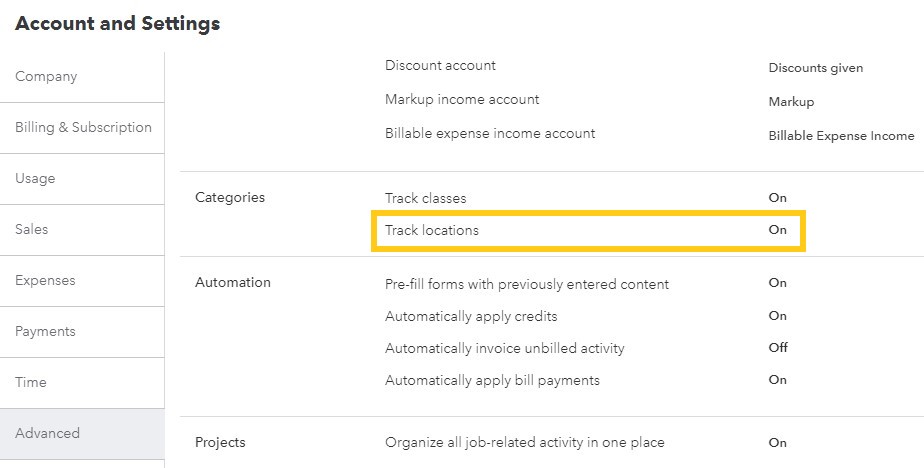
Please also enable locations in QuickBooks from QuickBooks settings → Account & Settings→ Advanced→ Track Locations
Now add the order location in EZRentOut Order with other details
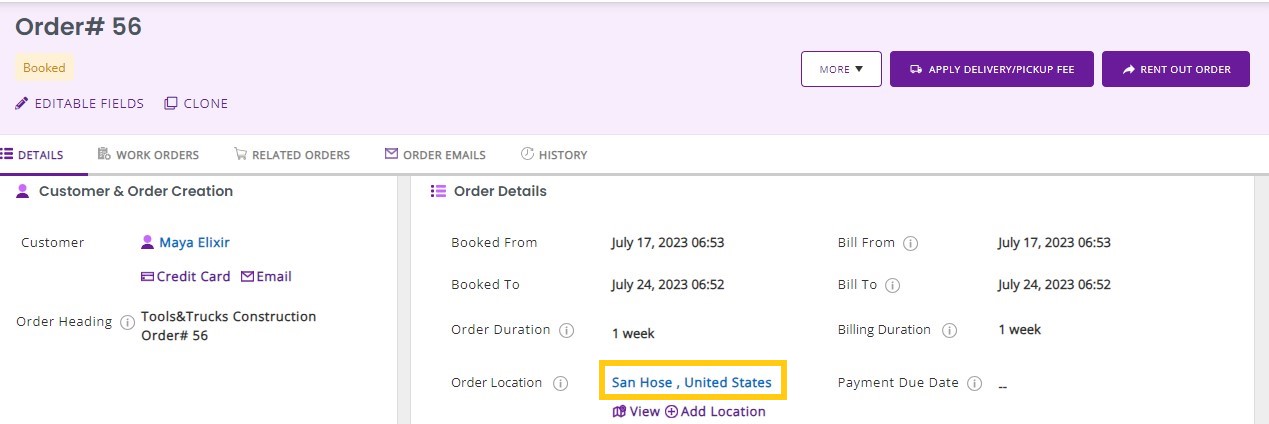
Please note that the same location names should exist in QuickBooks to sync locations in EZRentOut.
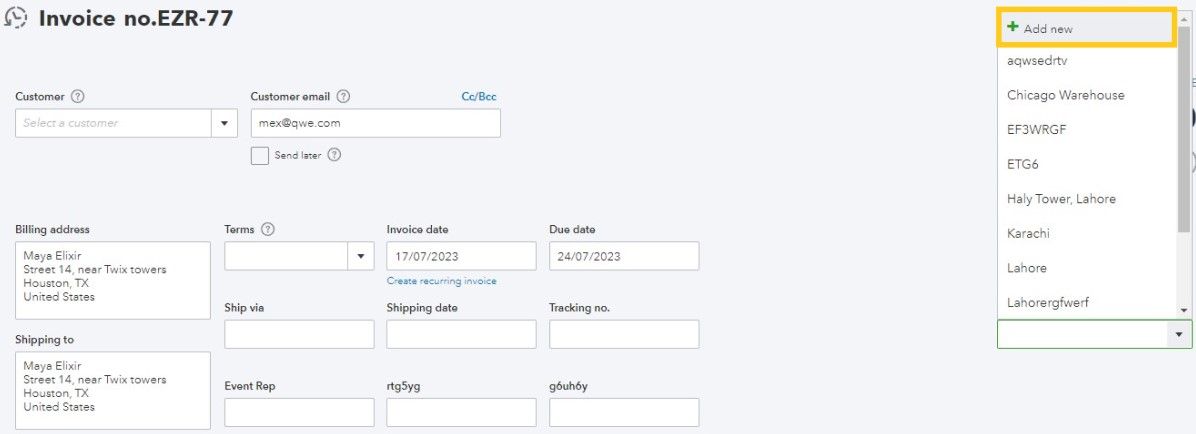
To add locations in QuickBooks, go to your synced invoice and add a new location from the location dropdown
7. Sync Taxes to QuickBooks Online
You can sync your taxes in QuickBooks Online and EZRentOut. Keep in mind that the tax added in EZRentOut and QuickBooks Online should have the same name on both platforms for a successful sync.
If your tax name exceeds 10 characters or you have entered different tax rates on each platform, you will get this message:
‘Tax not found, please create it on QuickBooks Online’
Please limit the tax name to under 10 characters and keep the rate of the tax the same, in amount or percentage, on both platforms, for a successful sync.
If the tax record is only present in EZRentOut and not in QuickBooks Online, you will get the following message:
‘Tax not found, click here to create’
Note: Remember that item-level tax errors will always appear in the order the line items are presented in the tax receipt.
8. Sync Status and history
As your sync is complete, you can view detailed information on the sync under the History tab. Please see Order 648 successfully synced on August 03 and other details as shown below:
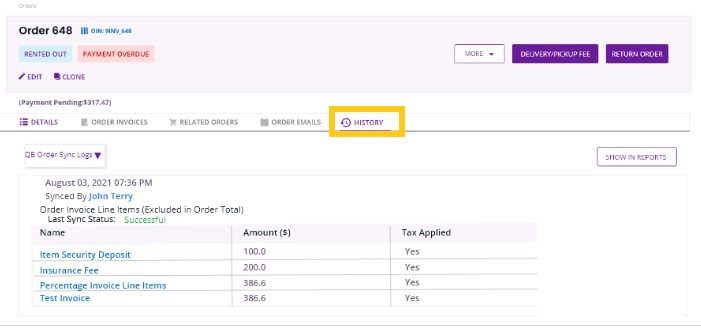
Apart from the first sync, these details will also show up in case there is any change. You can collapse the history and look at the detailed sync history. In case there is any change in the Order or Line Item, it will appear in the last automated sync when it was changed. You can collapse that to view the changes.
Note: You will get a ‘Sync Failure Reason’ if you are forcing a manual update before the automated sync happens, which is synced every minute.
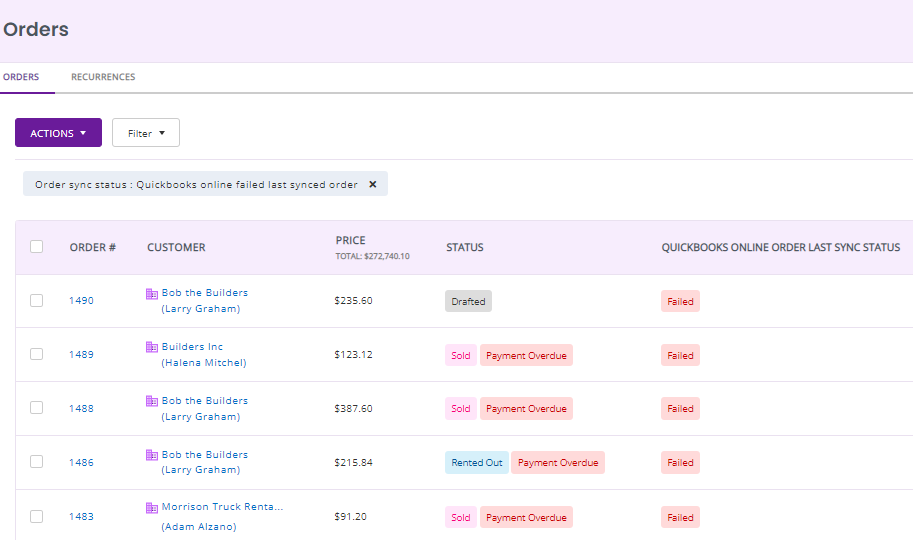
On the Order listings page, you can add three columns – QuickBooks Online Synced at, Last Sync Status, and Payment Last Sync Status from the ellipses on the right side. You can also apply the Order sync status filter per your requirement. You can choose filter options to see Orders that were successfully synced, failed to sync, or were not initiated for syncing with QuickBooks Online. A filter is applied on all Orders that fail to sync as shown below:
In the built-in reports, it is added only in Reports → All Orders. It can also be added manually in any Custom Report that you may create for your requirements.
9. Frequently asked questions
We love hearing from you!
Your suggestions and feedback are important to us. Let us know what enhancements would you want to see at support@ezo.io


