

Do you find a flat price rate for your rental customers restrictive? EZRentOut now offers an effective solution. You can customize pricing for your customers with our latest feature – Customer Level Pricing. This feature enables you to set personalized rates for your customers on an item level.
Let’s explore the feature in more detail.
Contents
1. Enable the feature
2. Set personalized pricing for customers
2.1. For Assets and Asset Stock
2.2. For Inventory
3. Customer-Level Pricing from the Customer Details page
4. Import Customer-Level Pricing
5. Generate custom report
1. Enable the feature
To enable the feature, go to Settings → Add Ons → Customer-Level Pricing and click ‘Enabled’.
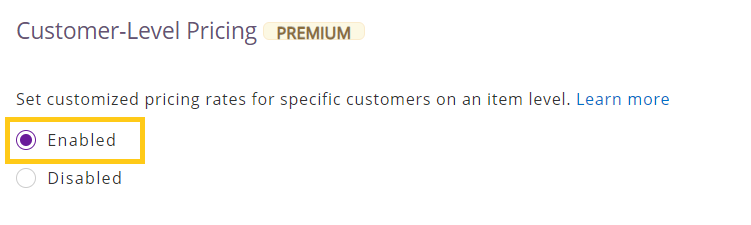
Scroll up and click ‘Update’ to save these changes.
2. Set customized pricing for customers
2.1. For Assets and Asset Stock
To set customized pricing for Customers, go to Items → Assets, and either add a new Asset or open an existing one. Once you’re on the Asset Details page, click on the ‘Edit’ icon. This reloads to an editable details page, where you can add Customer-Level Pricing.
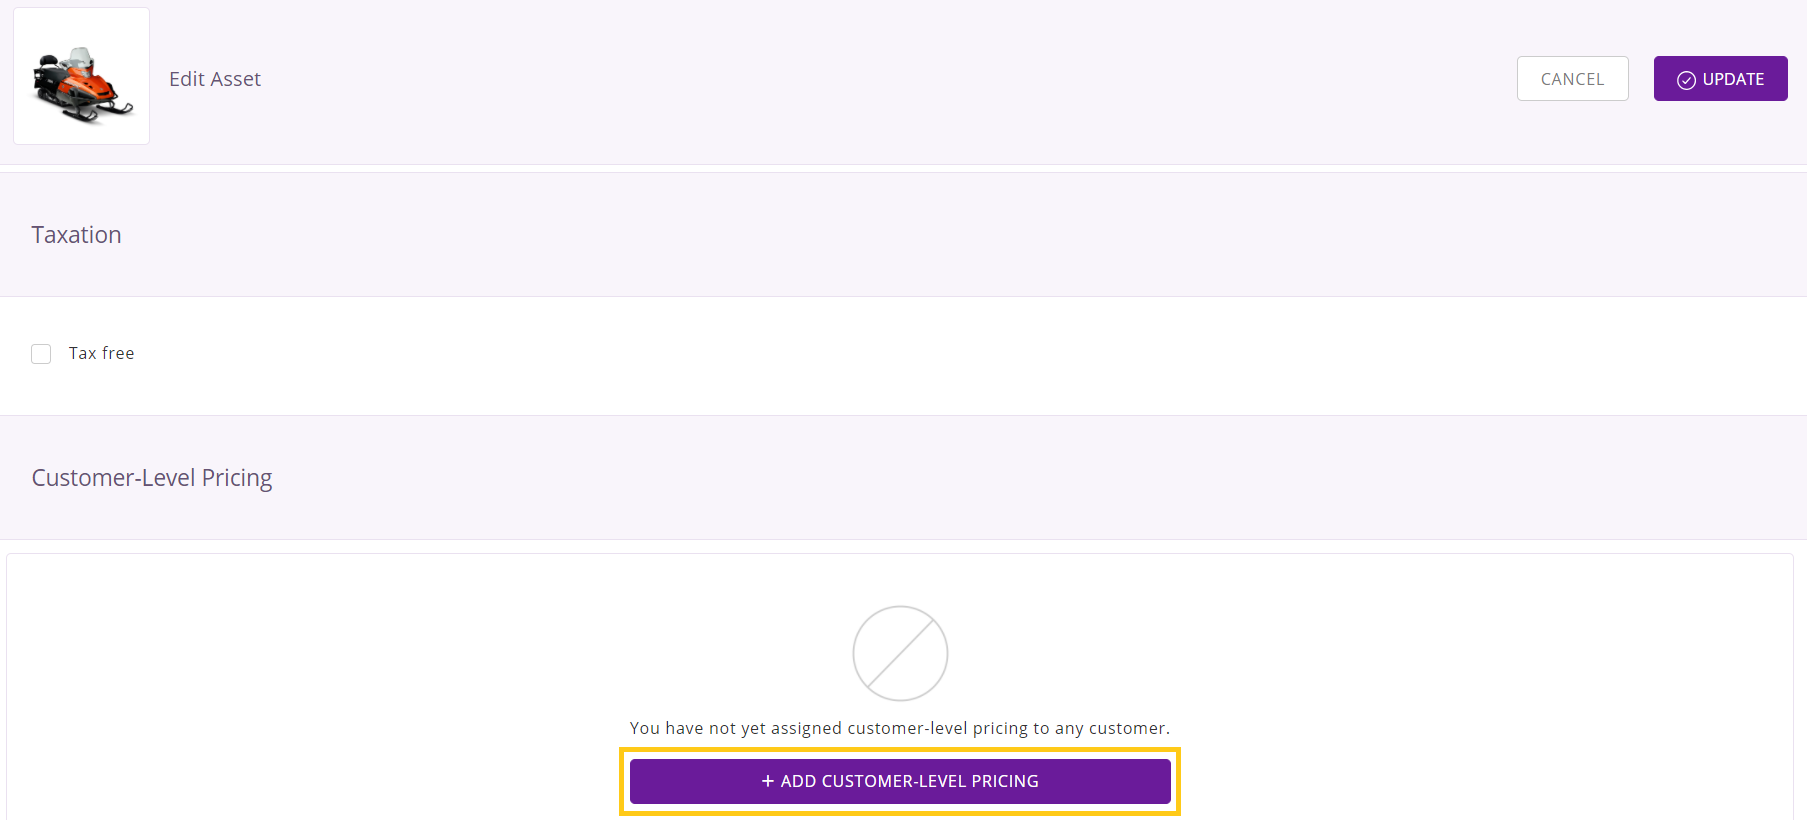
Choose the pricing mode you want to apply for a particular customer and fill out all the relevant fields. Then click on the ‘+ Add Customer-Level Pricing’ button to assign the pricing to a Customer. This opens up the following overlay:
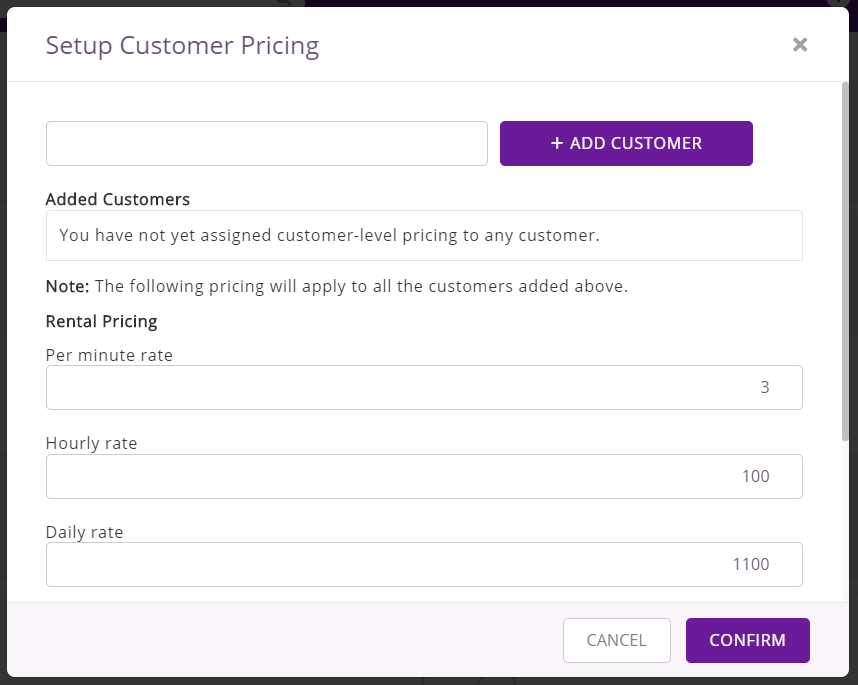
You can also make changes to the pricing directly from the overlay displayed above. Moreover, you can choose to apply the Asset’s pre-determined late fee or uncheck the option and enter a new value specific to that customer.
To assign the customized pricing to a Customer, type their name in the required field and click on ‘Add Customer’:
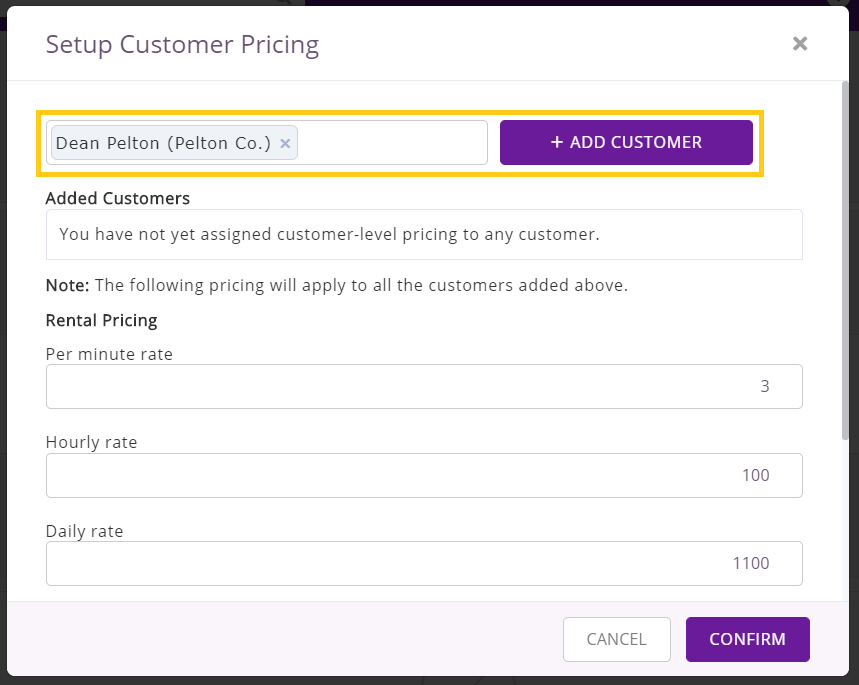
You can add as many Customers as you want and the customized pricing will apply to all of them. Once you have made the appropriate changes, click ‘Confirm’ to add the Customer-Level Pricing. Here’s what you’ll see in the Customer-Level Pricing section now:
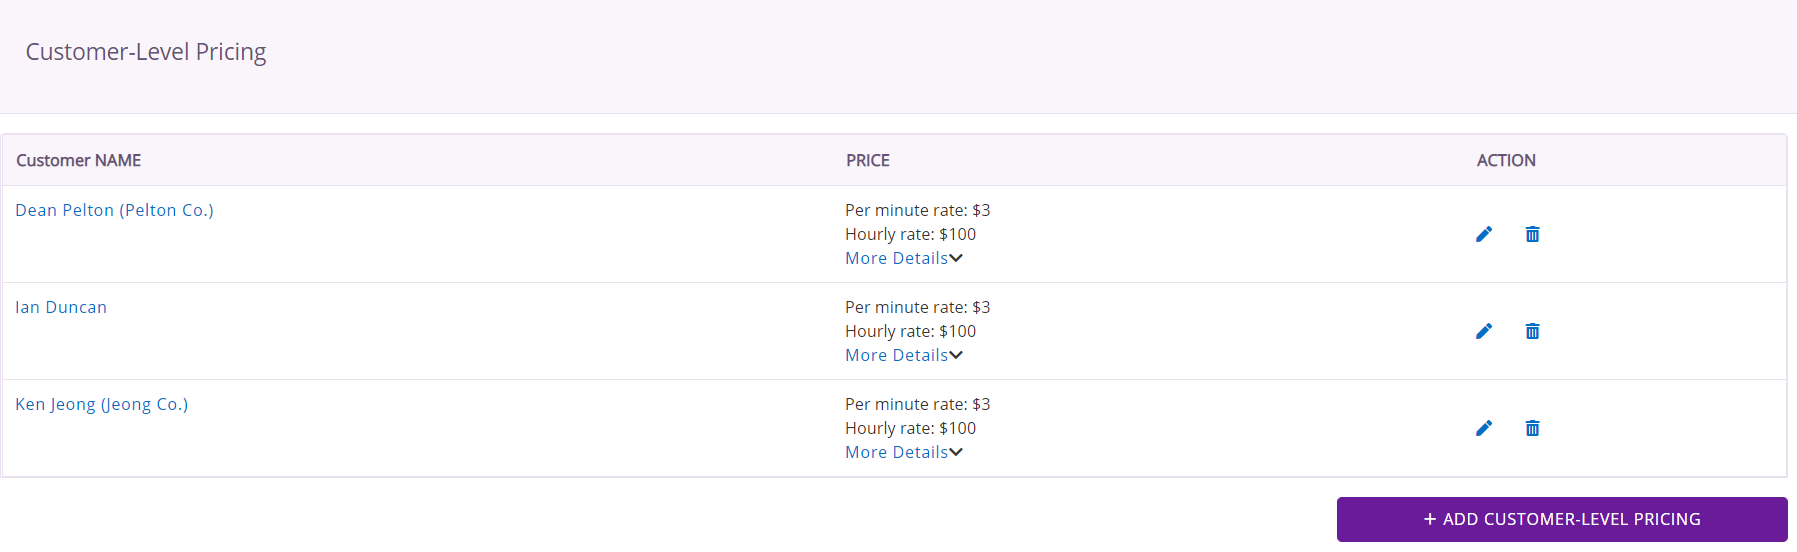
You can add more Customers and customize the pricing for them, simply by clicking the ‘+ Add Customer-Level Pricing’ button. Once you’re done, don’t forget to click ‘Update’ to apply all these changes.
Follow this process to set customer-level pricing for Asset Stock as well.
Note: The customer-level pricing for items will also be visible on the Webstore for the respective customers when they log in.
2.2. For Inventory
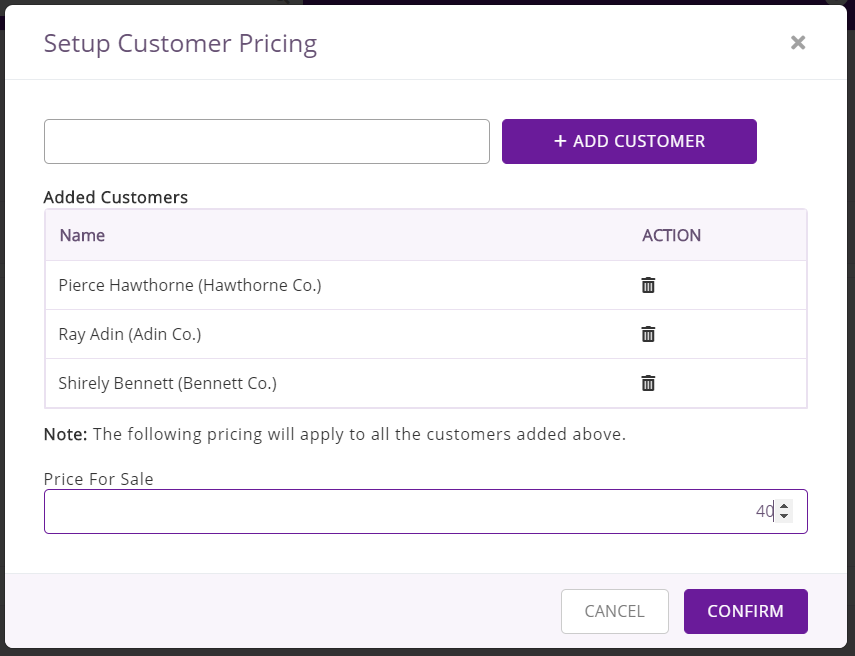
For Inventory, you can specify unique sale prices for specific Customers. Go to Items → Inventory and add a new Inventory item or edit an existing one. Then add customer-level pricing as explained above. Use the overlay displayed below to add Customers and specify the sale price you want to charge them:
3. Customer-Level Pricing from the Customer Details page
Go to the Customers tab and click on a Customer. On the Customer Details Page, go to the ‘Related Items Pricing’ tab. Here, you can view all the items with customized pricing for that particular customer:
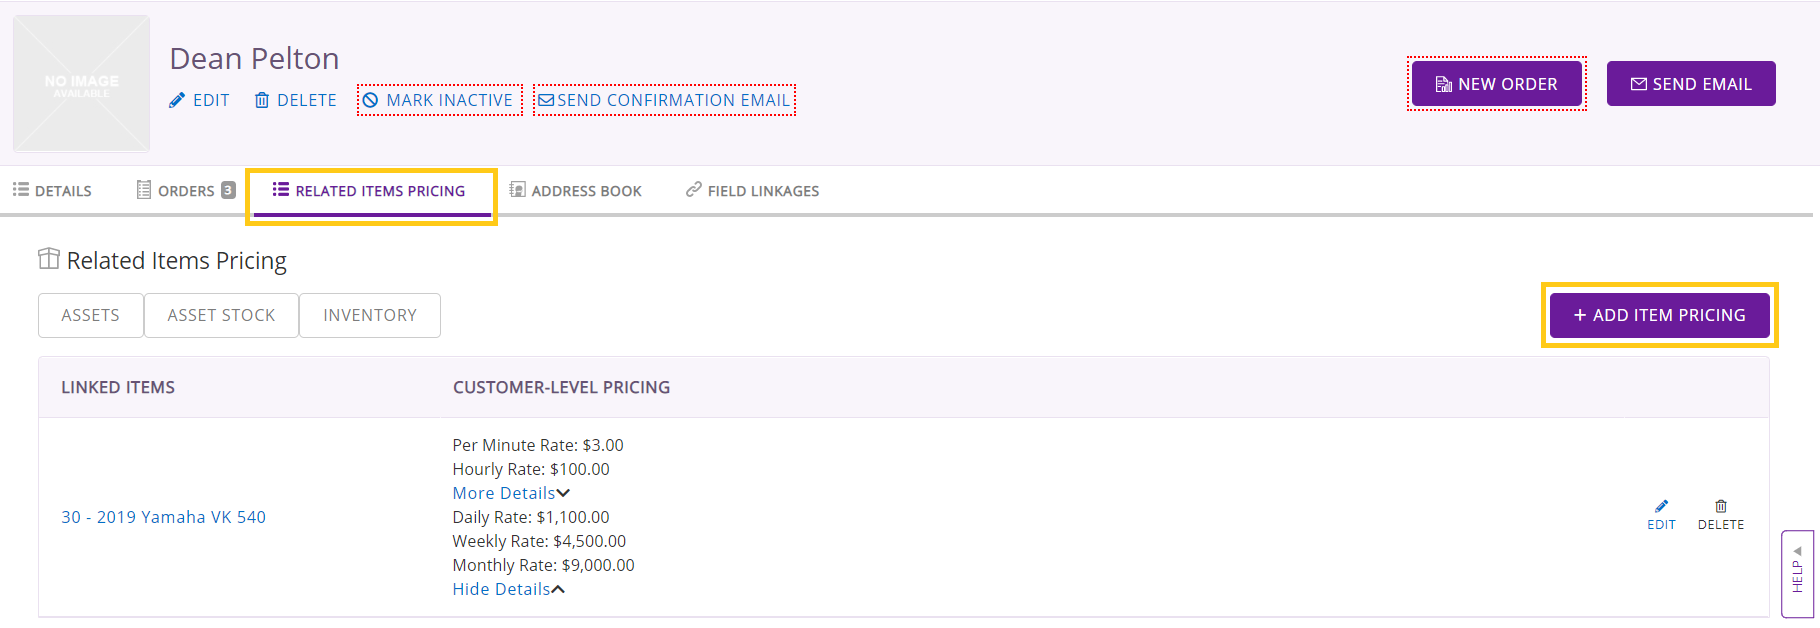
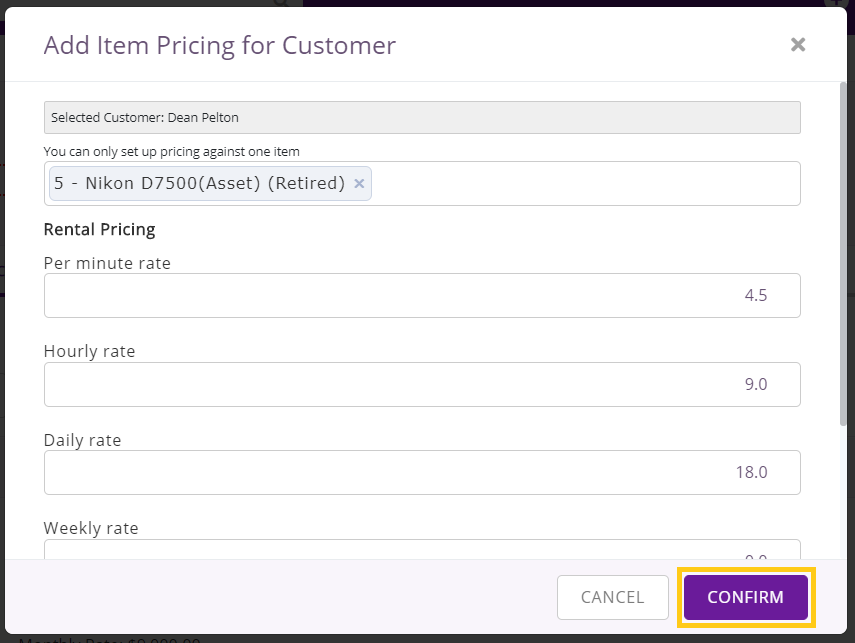
Here, you can edit the customized pricing for each item if required, as well as delete it. Moreover, you can set up pricing for a particular item from this page by clicking on the ‘+ Add Item Pricing’ button. The following overlay appears, where you can search and add items and specify their prices:
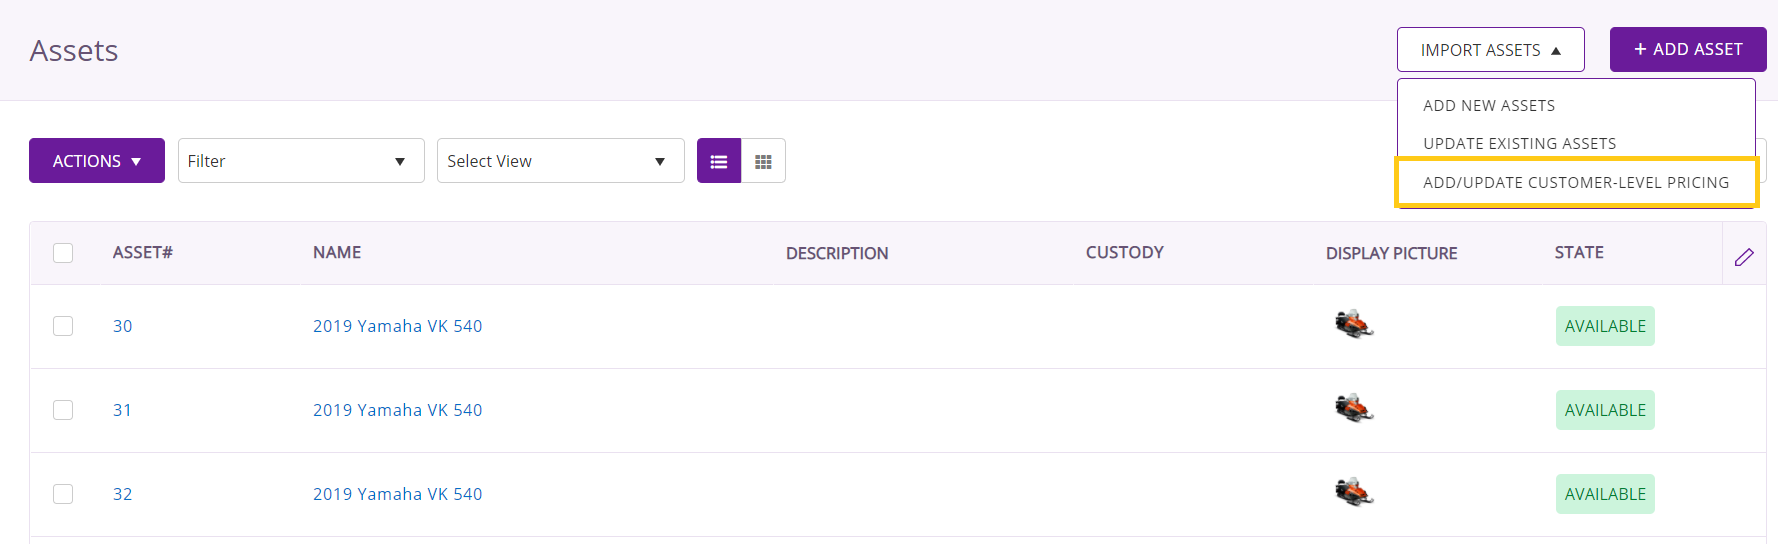
4. Import Customer-Level Pricing
You can also import the Customer-Level Pricing directly from Excel. Go to Items and open any module from Assets, Asset Stock, and Inventory. Then click on the ‘Import From Excel Sheet’ button and select the ‘Add/Update Customer-Level Pricing’ option.
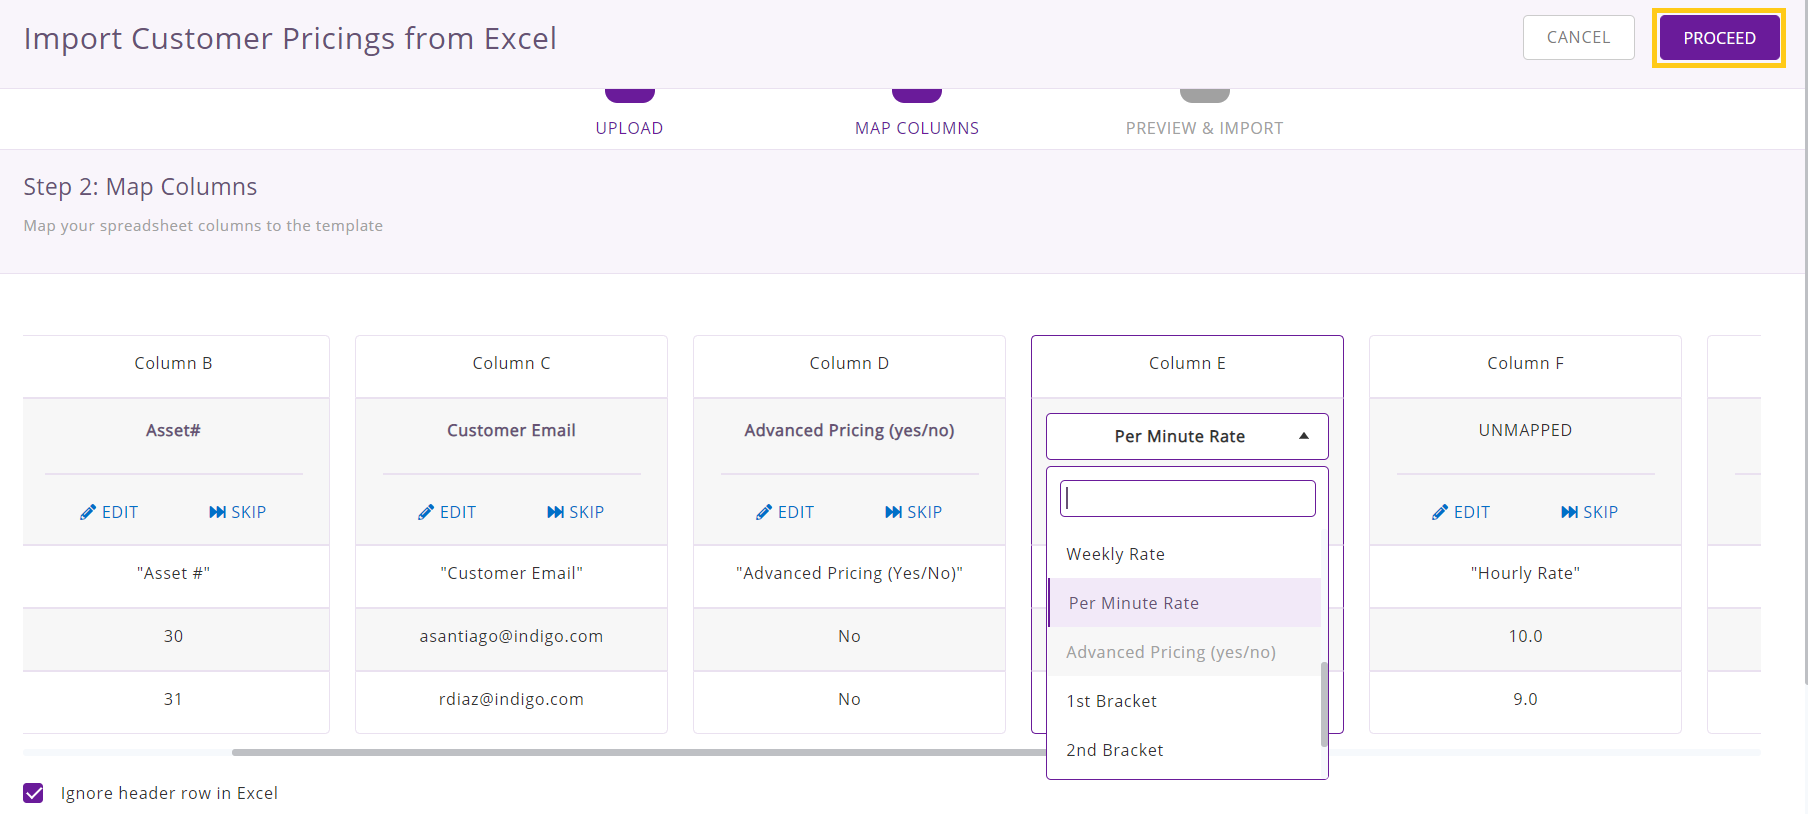
Next, choose and upload the relevant Excel file. Then you’ll have to map the columns from the file to the relevant fields in EZRentOut.
You can specify the Asset you’re adding/updating the pricing for with the AIN and Asset#. Next, map the Customer email column so the system knows which Customer the pricing is for. Then you can map the pricing columns and hit ‘Preview and Import’. To understand how different rental rates work, click here.
Then you’ll see the following preview of the customer pricing imports:
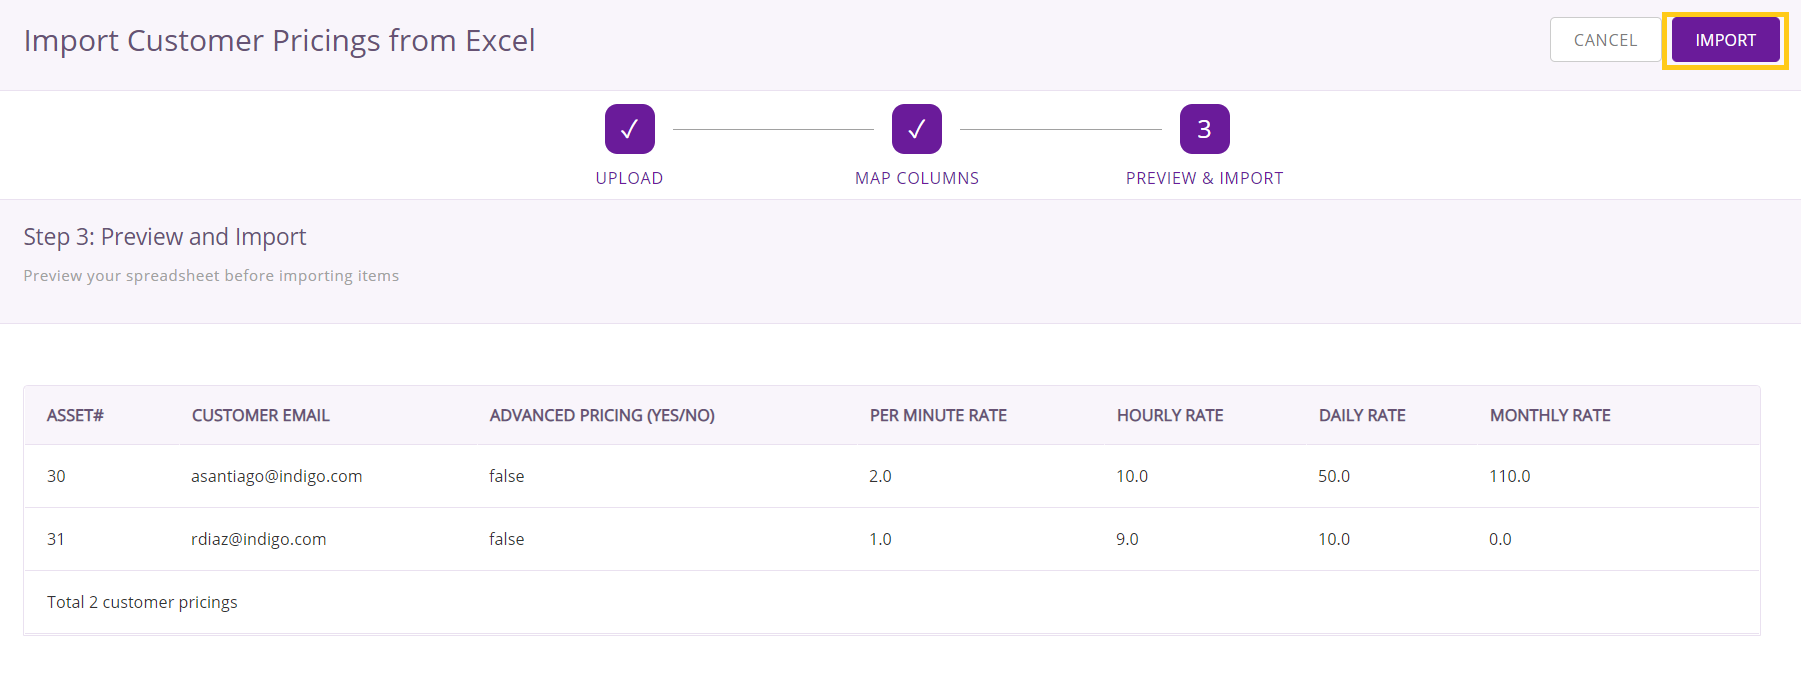
Once you hit the Import button, all the customer-level prices will be added or updated to the relevant items.
Read More: Importing Items from Excel to EZRentOut
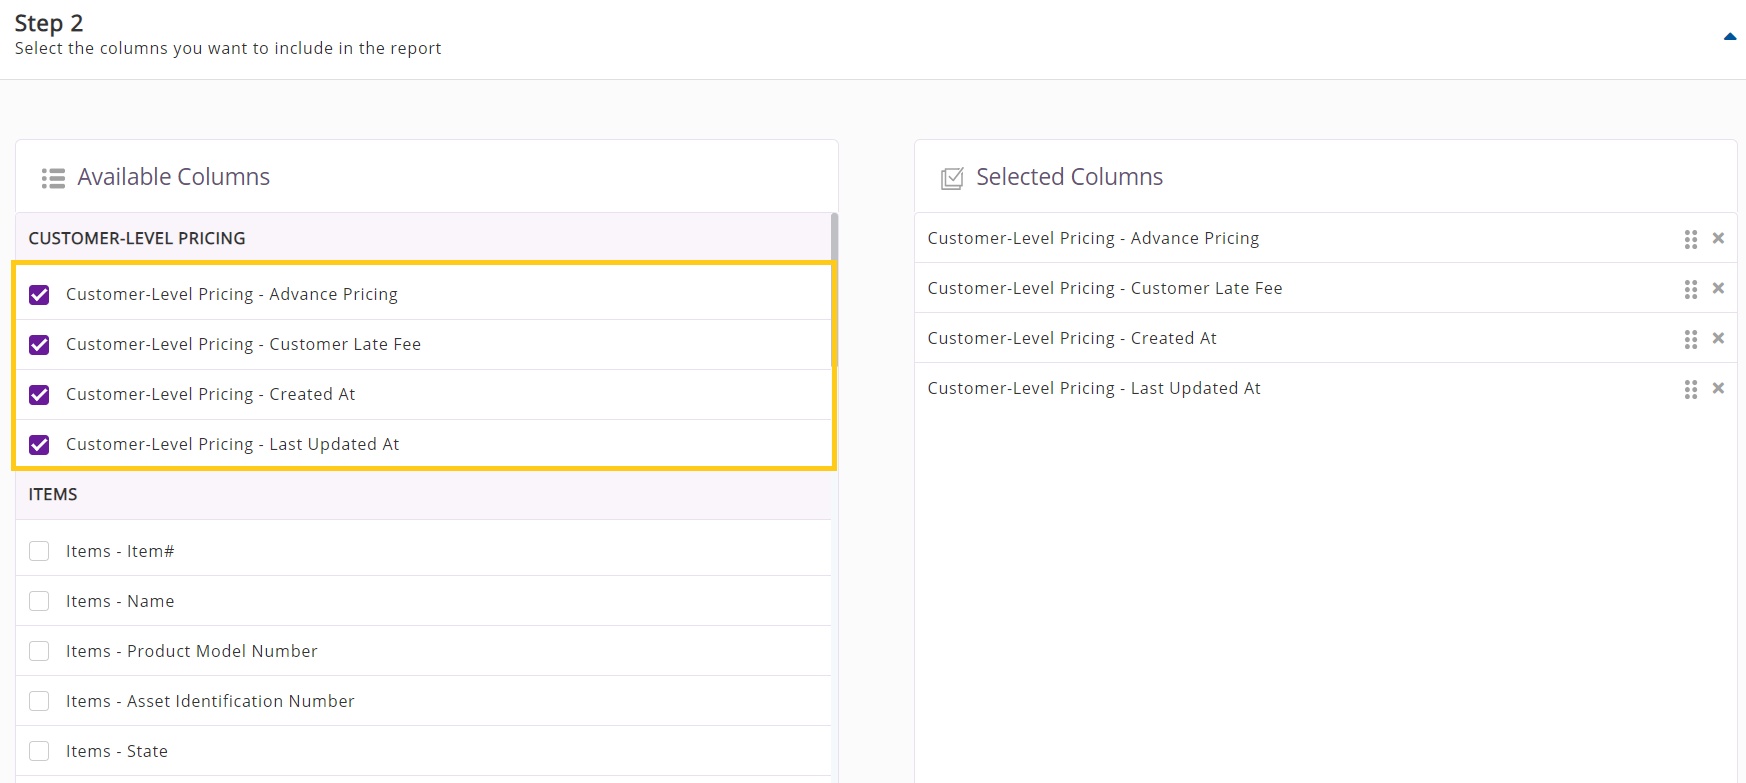
5. Generate a custom report
Go to More → Reports → Custom Report. In Step 1, you’ll see the new module of Customer-Level Pricing to help you build your custom report:
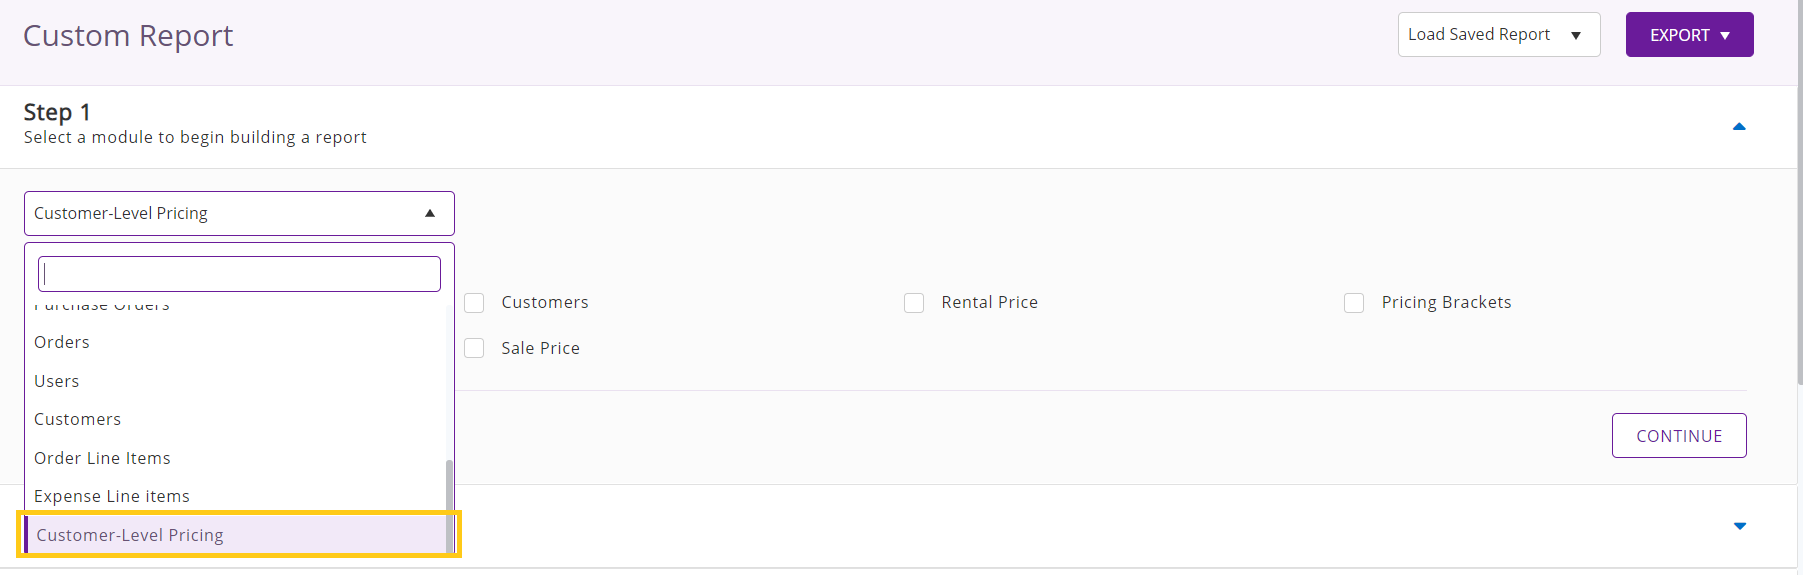
Continue building the report as per your requirements with the help of EZRentOut’s guide on generating custom reports. In Steps 3 and 4, you can also apply filters and group items by using options related to customer-level pricing:
Have any questions?
EZRentOut is the leading equipment rental software used by SMBs all over the globe.
For more assistance, drop us an email at support@ezo.io.


