

We aim to give you the best Point of Sale for your rental business with EZRentOut. For this reason, EZRentOut users can easily integrate their Authorize.net account with their EZRentOut account. They can advertise rental items online on our customizable Webstore and manage payments by charging customer credit cards.
In order to quickly process online payments through credit card, EZRentOut integrates with Authorize.net, Payflow, Stripe, and Moneris (Beta).
This blog will detail how you can charge payments in EZRentOut using Authorize.net.
Related Posts: Charge payments in EZRentOut with Stripe | PayPal | Payflow | Square | Braintree
Features supported on the Authorize.net Integration
| Payment on Webstore | Payment via Mobile App | Payment via Broadband App | Payment via Customer Portal | Refund Payments |
| Multiple Gateways | Card on File Payments | Automate Recurring Payments | QuickBooks Sync (Desktop and Online) | Xero Sync |
Integrating your Authorize.net account
Before you begin, please ensure that you have an Authorize.net account to manage Credit Card payments. Then, you can go to your EZRentOut account to integrate it.
- Go to your EZRentOut Dashboard and from there, to Settings –> Add Ons –> Enable Payments Through Credit Card. Here, select ‘Use Authorize.net’.
- Enter the Authorize.Net Login ID & Transaction Key. These are available in your Authorize.net account from Accounts –> Settings –> Security Settings –> General Security Settings –> Click ‘API Credentials & Keys’. More information here.
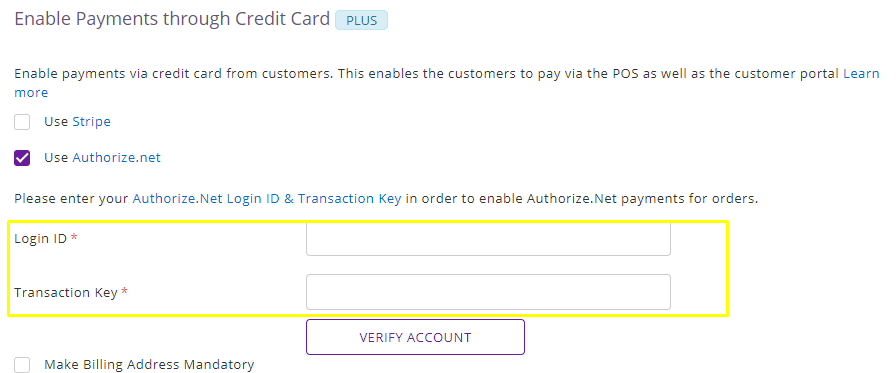
- Once you’ve entered both the keys, hit the ‘Verify Account’ button to check whether Authorize.net has been successfully connected or not.
- You can also choose to check the option ‘Keep credit card on file when a customer enters details from the customer portal’. This will save the credit card details last provided by customers via the customer portal. These details can then be used to charge any future payments.
- Once done, scroll down to the end of the settings page and click ‘Update.’ This will save the settings and successfully connect your EZRentOut account to Authorize.net.
Read more: Retrieve the Login ID and Transaction Key for Authorize.net integration
Here are some additional things to note while you’re integrating your Authorize.net account:
- EZRentOut does not charge any commission/fee on transactions.
- If credit card details of a customer are entered by staff or admin user, they are always saved to your merchant gateways’ on-file storage, avoiding the need to re-enter credit card details for subsequent orders.
- For security reasons, EZRentOut doesn’t record this credit card information in its own database. Instead, it creates credit card profiles of customers in Authorize.net and only accesses this credit card information on ‘charge payment’ requests.
- To check the credit card profiles of customers, log into Authorize.net and go to Tools –> Click ‘Customer Information Manager’ in the main left-side menu.
Read More: Why Equipment Rental Software makes sense for SMBs
Troubleshooting
You may receive the following error messages when trying to charge a credit card in EZRentOut through Authorize.net.
Customer Information Manager is not enabled
This error is received when the CIM (Customer information management) module is not enabled in your Authorize.net account. To enable this module, sign in to your Authorize.net account and go to Account –> User Profile and Verify check against ‘Manage CIM Profiles’ under ‘Transaction Processing Permissions’ section.
Transaction has been declined
This message is received when your transaction is submitted from a blocked IP address. To whitelist our IPs in Authorize.net, log into your Authorize.net account and go to Tools –> ‘Fraud Detection Suite’ –> Click ‘Authorized API IP Addresses’ under IP Administration section and add the following two IP addresses (see image below):
- 54.208.123.254
- 52.2.223.197
To understand some of the error responses received when charging credit cards through Authorize.net, click here to view their reference guide.
Read More: Ways to generate revenue using Rental Management Software
Swiping the card
Let’s take a look at how charging payment via Authorize.net works in EZRentOut.
- On the order details page, with every customer, you’ll see the Credit Card icon. It displays this message when there is no card in the record.
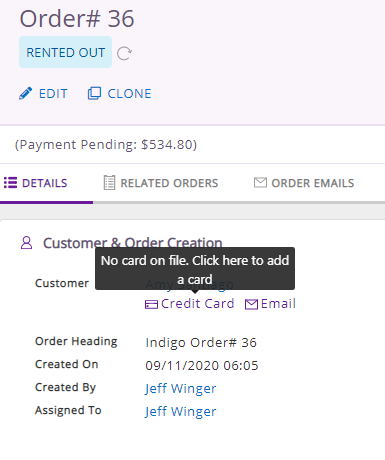
- The following is the form that pops-up when you click the red/green Credit Card icon. You can either swipe the credit card that allows us to catch all the details or add in the credit card details manually.
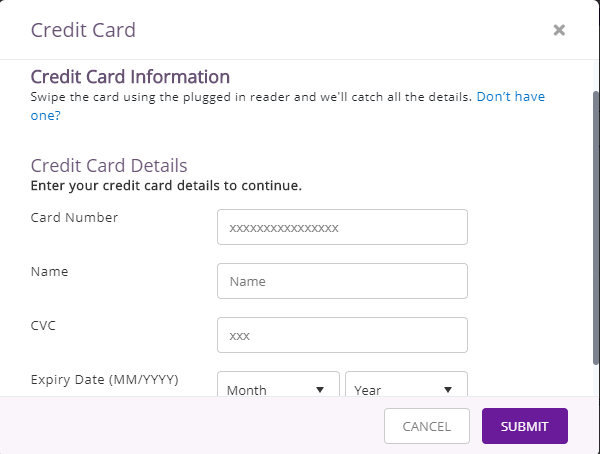
- Once the credit card information is entered, it’s saved on file (in Authorize.net’s database) and the Credit Card icon shows the last four digits of the card.

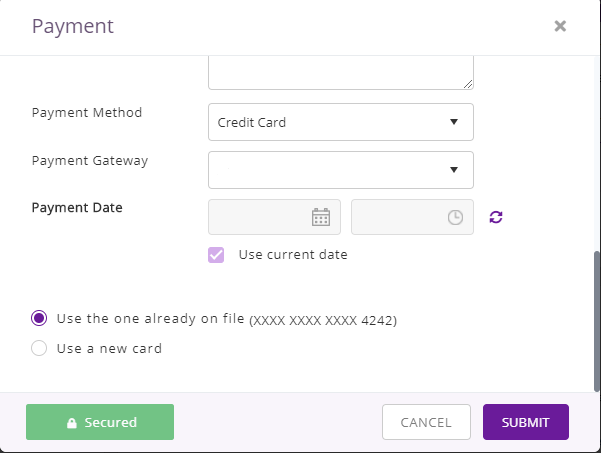
- Now when charging payment on this order, you can choose to use the Credit Card already on file or use a different card and update the card on file for this customer.
Note: EZRentOut integration with Authorize.net supports credit card swipe with any generic magnetic card reader. However, we do not yet support POS based EMV card readers provided by Authorize.net.
For more information on magnetic swipe cards and EMV cards, read here.
More on orders:
Charging mass payments for multiple orders
You can charge payment for multiple orders to the same or different customers in one go. For tips on charging payments on multiple orders, read this post before you begin.
Here is how you charge mass payments for multiple orders:
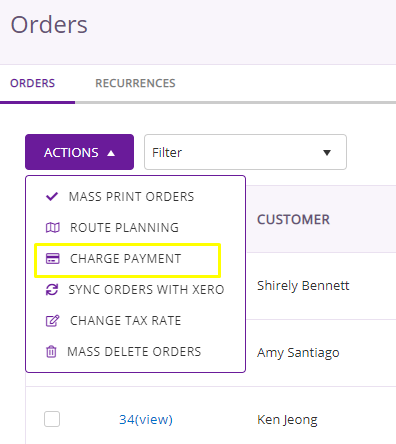
- Go to Orders listing page and multi-select orders you need to charge payment for.
- Click on ‘Actions’ and select ‘Charge Payments’.
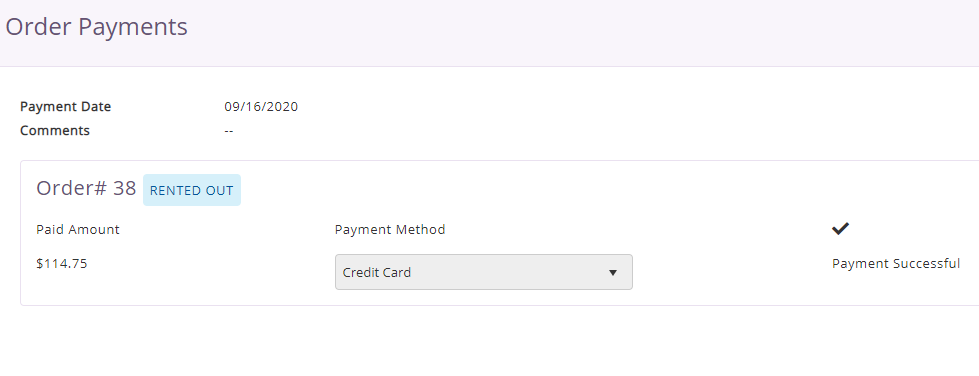
- A dialog box will appear for Order Payments (see image below). Here you can configure details such as payment date, preferred payment gateway, order payment specifics, and comments.
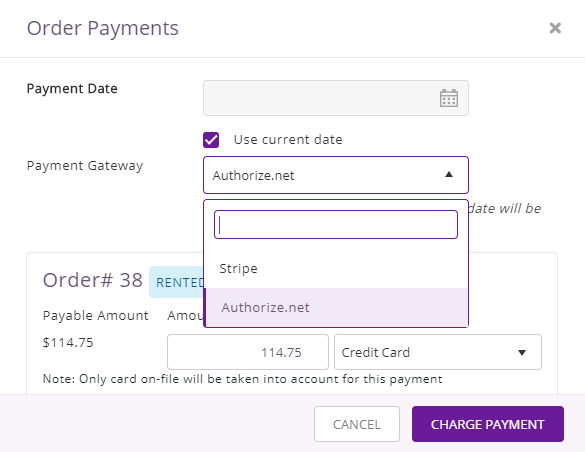 Note: CC payments can only be charged to customers with their cards saved on-file.
 - Hit ‘Charge Payment’ once done. Here’s what you should see next:
Pre-Authorize or Hold Payments
Pre-Authorizing a payment is also supported. Say, you want to hold an advance payment of $275 and when the payment date arrives, deduct the entire rental price e.g. $429, including the pre-authorized amount. You just need to choose ‘Pre-Authorize’ when charging payment.
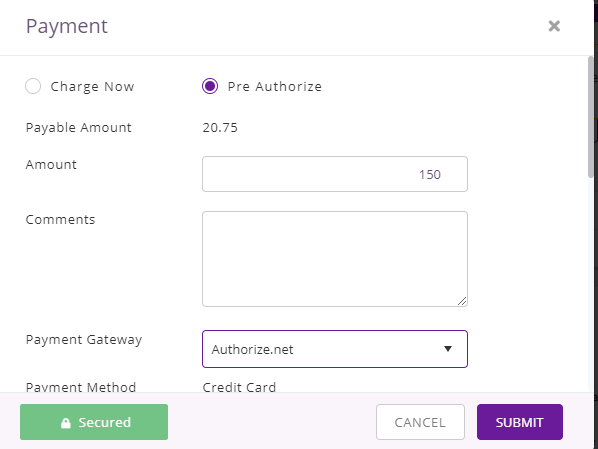
You can then charge or cancel the hold.
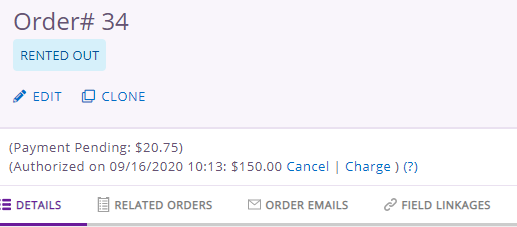
- If you charge the Pre-Authorized amount, your customer has to pay the remaining $20.75 via card or cash.
- If you cancel the Pre-Authorized amount, your customer is entitled to pay the entire rental fee of $170.75 via card or cash.
Share your rental management software experience with us!
We’d love to hear about your EZRentOut experience. Drop us an email at support@ezo.io.


