

Running a successful rental business is not easy, with thousands of orders to process and payments to charge on a daily basis. These routine tasks require time and resources to be managed. Connecting your EZRentOut account with enhanced Square integration automates charging payments – in particular, it simplifies repetitive actions required by each transaction.
Get paid faster and quickly charge payments on recurring orders through saved customer card details in the orders module. From rental orders in the web application or the webstore, EZRentOut makes it easy to use Square to simplify the payment process in-store or online. Save time and effort, and make your business more profitable by integrating your Square account with EZRentOut.
Let’s look at the workflow to help you get started with the integration:
How to enable Square Integration
1. Integrating the Square account
1) You’ll need a Square account to manage credit card payments via Square.
2) Existing Square customers need to reconnect with Square. Go to Company Settings → Add Ons → Uncheck the ‘Use Square’ box → Click Update. This is required to provide necessary permission access to Square.
3) Set up your Square account from EZRentOut. Go to Company Settings → Add Ons → Enable Payments through Credit Card → Select ‘Use Square’.
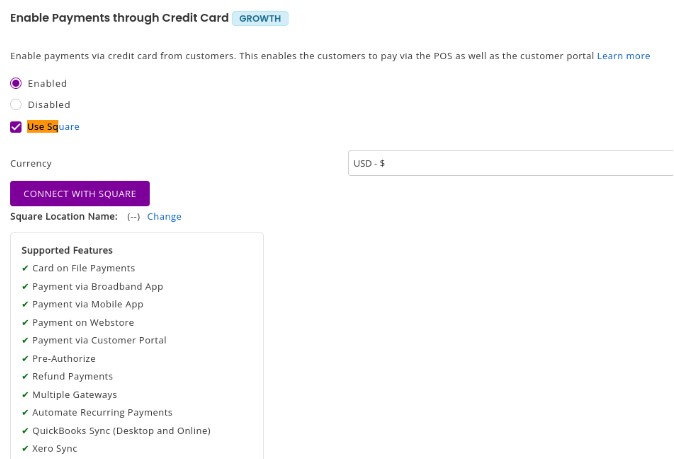
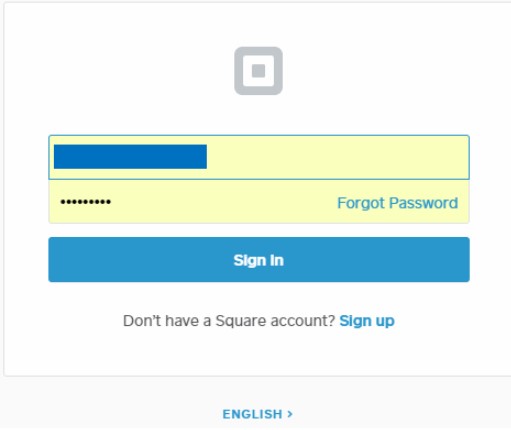
4) Once you click ‘Connect with Square’, you’ll need to authenticate your Square account. This will take you to Square’s login page.
5) Provide the necessary permissions to Square. An OAuth dialog box will appear, click ‘Allow’ to continue (see image below):
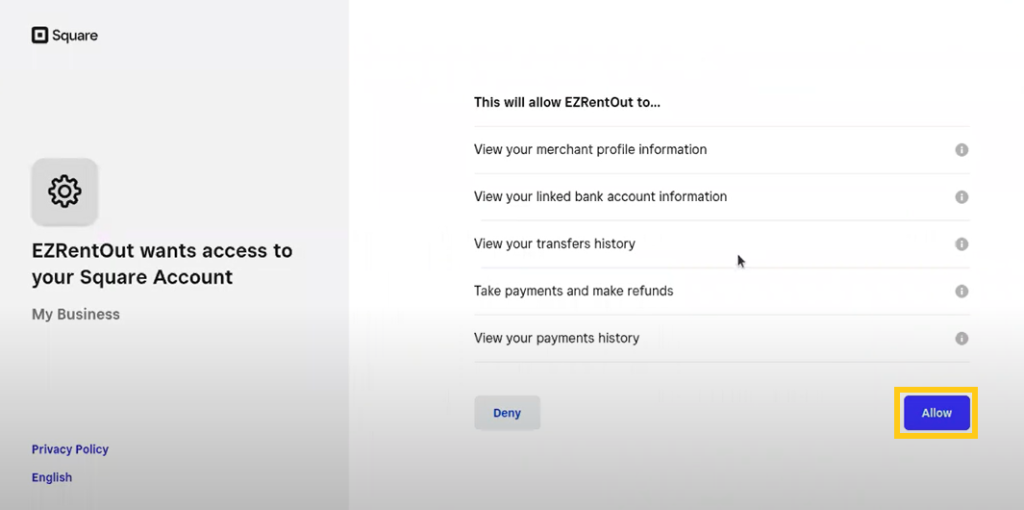
6) Once you’ve allowed EZRentOut access to your Square account, it will redirect you to your EZRentOut account.
7) You’ll be asked to choose the location in Square where EZRentOut will process your transactions. These locations are predefined in your Square account. For example, you want ‘NYC Headquarters – Accounts’ to record all your transactions.
Click ‘Connect’ after choosing the desired location.

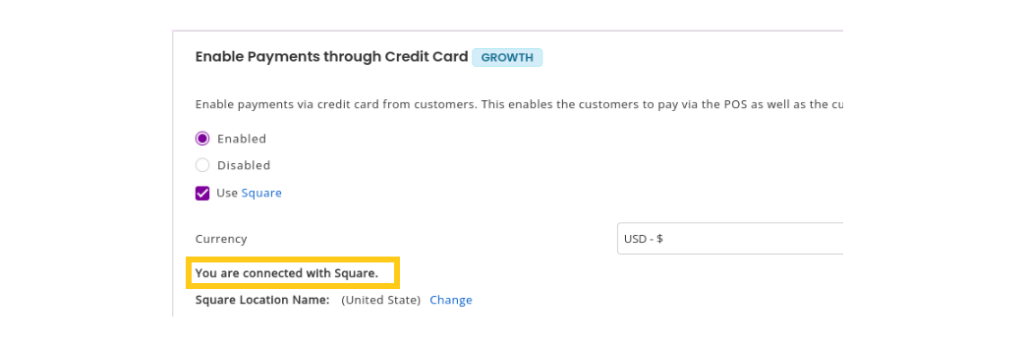
Note: You can always change the Square location from Company Settings → Add Ons → Enable Payment through Credit Card → Use Square → Square Location Name. Here, click ‘Change’.
8) Upon successful connection, you’ll be shown a message on top of the Add Ons page, and the message “You are connected with Square” will be visible under Enable Payments through Credit card → Use Square.
9) Once you’re all set, scroll up to the top of the settings page to click the ‘Update’ button and save the settings.
2. Integrating with Square POS Terminal
If you’re looking to charge your customers using an in-store credit card swipe, follow the steps below:
1) You can set up Square hardware and the App using the link here.
2) New Square users can connect with the Square terminal after successfully enabling Square credit card integration with EZRentOut.
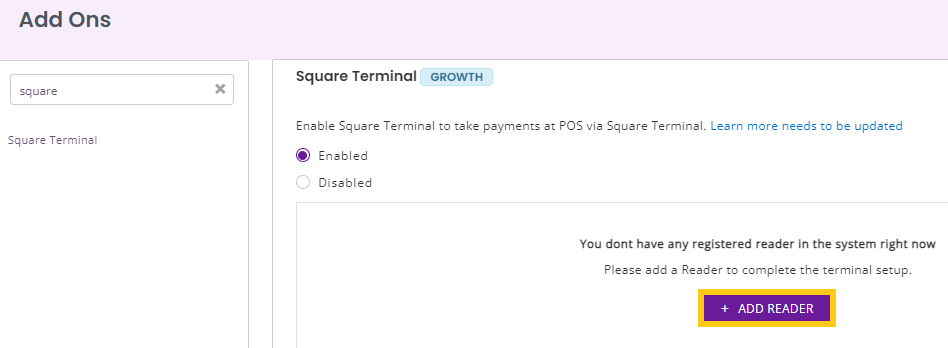
3) To set up the Square terminal in EZRentOut, please Go to Company Settings → Add Ons → Square Terminal. Click the ‘+Add Reader’ button.
4) An overlay will require you to enter the reader’s name while auto-detecting the location. Click on ‘GENERATE CODE’ to generate a code.

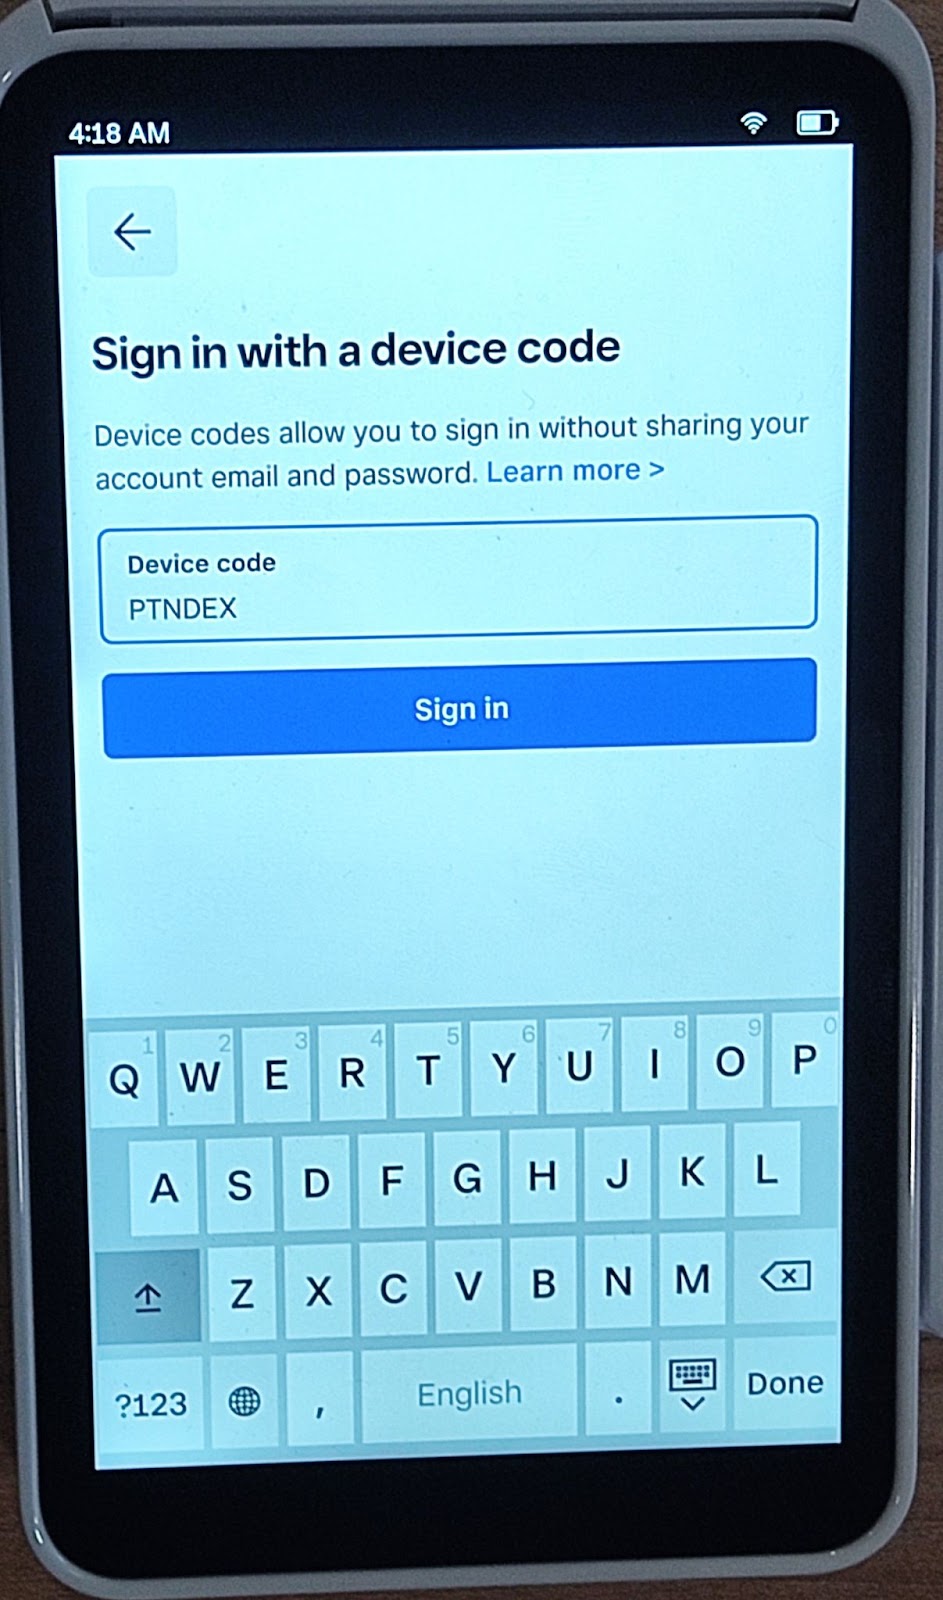
5) Enter the generated code to connect the Square terminal. This code will only be valid for 5 minutes.
6) Please wait for the Square terminal to process the reader details. Upon successful processing, the Square logo will appear on the terminal screen as shown below:

7) You’re now connected to the Square terminal. The details are added under the EZRentOut Add Ons settings.
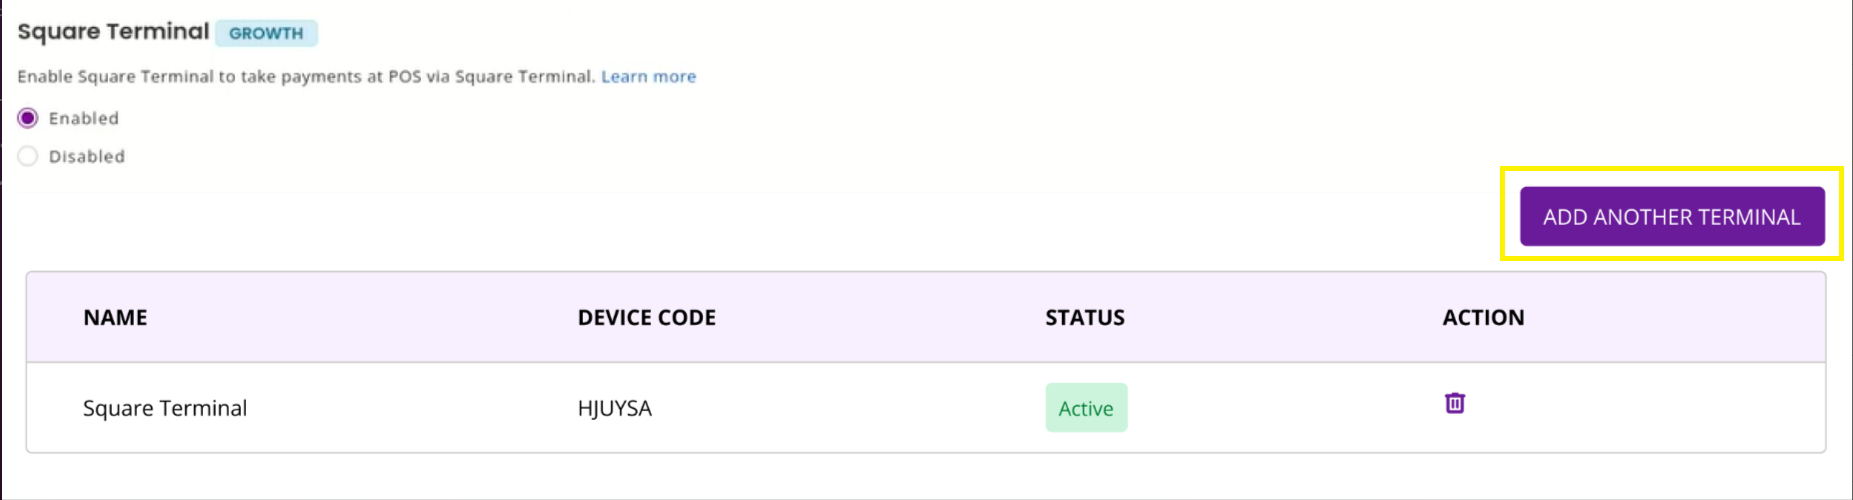
8) You may add multiple Square readers if you have more than one store with Square terminals. To add another terminal, click on ‘ADD ANOTHER TERMINAL’ and follow the steps mentioned above. When adding another terminal, please keep the names of the readers distinguishable and recognizable, ideally by location, for your convenience and quicker checkouts.
9) When charging through EZRentOut, select the right reader.
3. Add card details on the customer details page
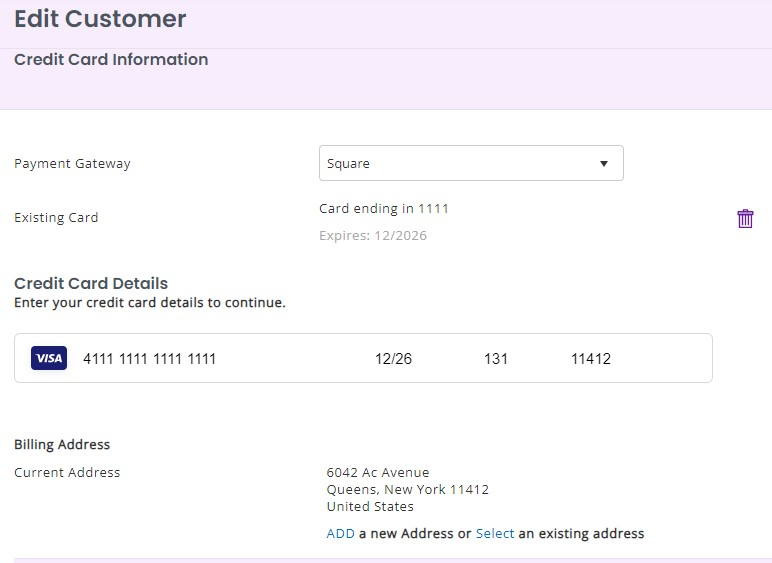
Go to Customer details page → Edit → Credit Card Information
Choose payment gateway as Square from the dropdown menu. Then, add your card details and click Update.
4. Add credit card details on the Order details page
Let’s say you would like to charge $100 of the order total and select credit card as payment method. You can now use the saved card details of the customer to charge payments for Orders.
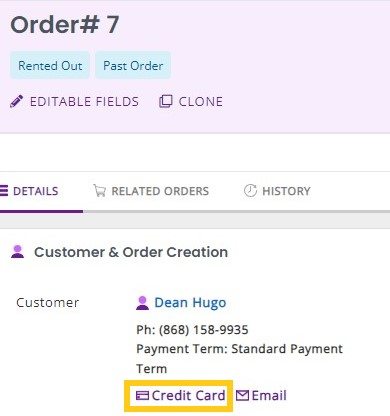
On the order details page, click the credit card icon under Customer and Order Creation details.
A credit card overlay will appear with the option to use the one already on file
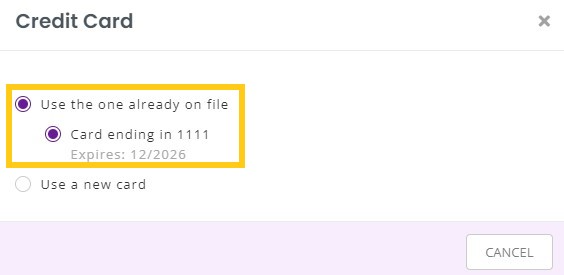
You can also add a new card from the order details page. Choosing the second option above, “Use a new card” will extend the overlay asking for credit card details shown below:
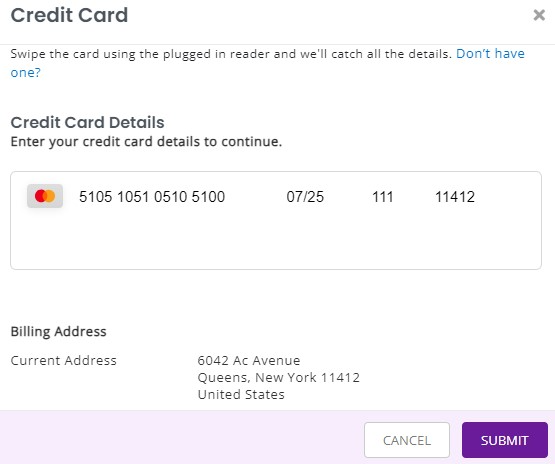
Click Submit and your new credit card will be added successfully.
4.1. Save credit card details on Square Terminal
You can also swipe a credit card using the Square terminal from the Order details page. Choose your payment gateway as Square terminal and add a billing address.
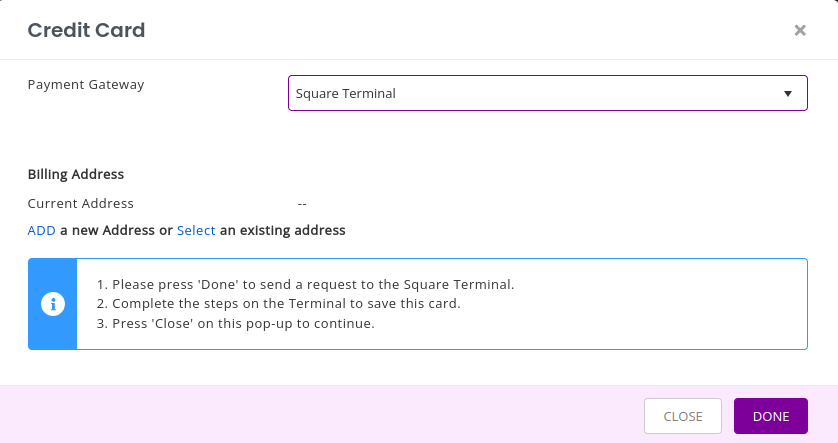
Click the Done button to save the credit card. This will send a request to your Square terminal where you will be asked to insert or swipe your credit card. Once the card details are fetched, the terminal requests to confirm saving the card on file and also enter the customer’s email address for verification.

After providing confirmation, click the Close button on the EZRentOut Credit card overlay and your card will be saved successfully.
A ‘CANCEL REQUEST’ button will appear in place of the ‘SUBMIT’ in case you want to cancel the request altogether.
The default time to insert, swipe or cancel the credit card for saving card details on the terminal is 5 minutes.
4.2. Charging payments on the Order details page
On the order details page, Go to More → Charge payments. A payment overlay will appear requesting you to fill in an amount to charge, then choose Credit Card from the payment method dropdown and Square from the payment gateway dropdown.

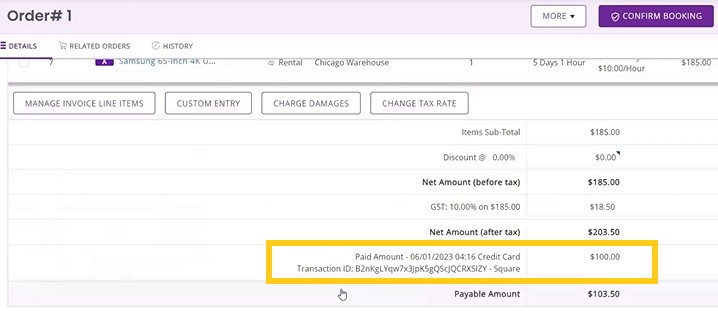
Next, you can choose to charge payment from an existing card or add a new one. The square transaction ID along with the time and date will be shown on the order details page after the payment has been successful.
4.3. Charging payments using Square Terminal
You can also charge payments using Square Terminal on the order details page. Go to More → Charge payments. A payment overlay will appear requesting you to fill in an amount to charge, then choose Credit Card from the payment method dropdown and Square Terminal from the payment gateway dropdown.
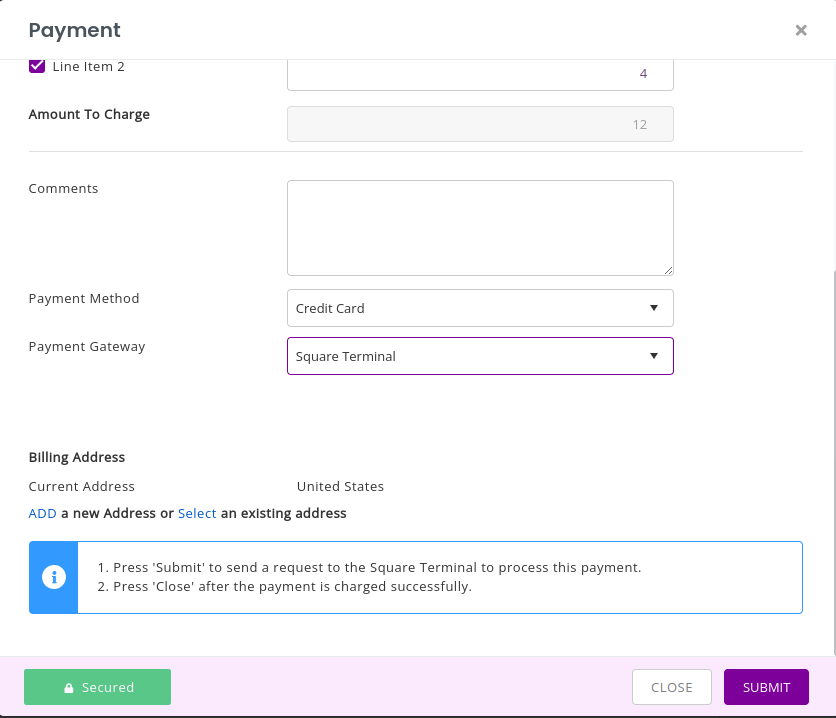
Click the ‘SUBMIT’ button to process this payment. This will send a request to your Square terminal where you will be asked to insert or swipe your credit card.
A ‘CANCEL REQUEST’ button will appear once you click the ‘SUBMIT’ button in case you want to cancel the request.
The default time to insert, swipe or cancel the credit card is 5 minutes.
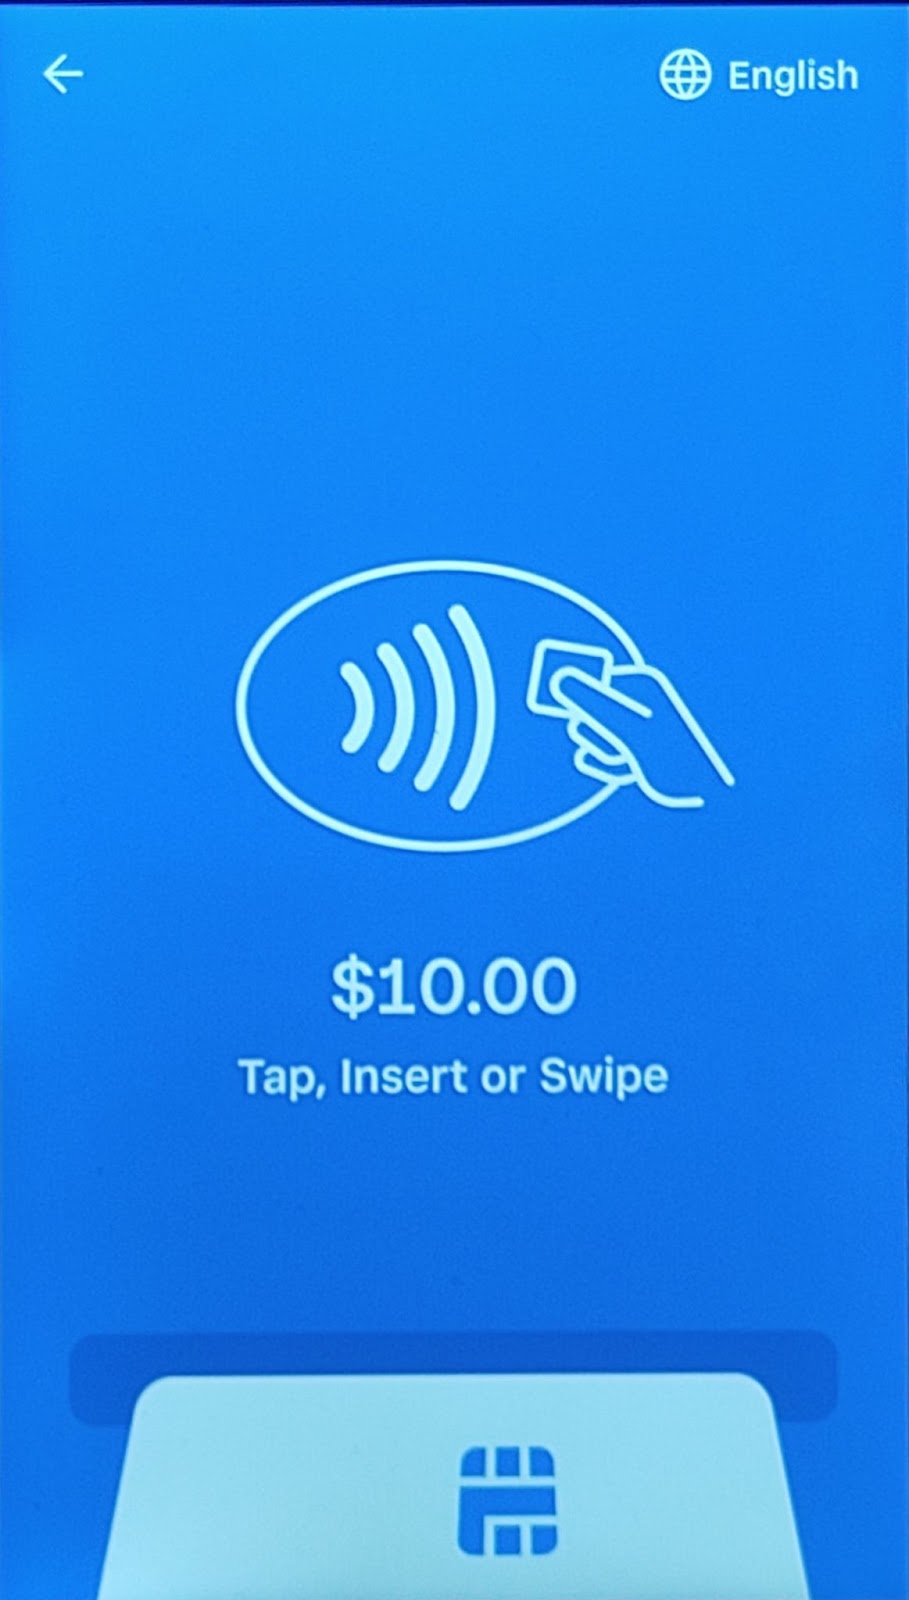
Your credit card details will be authorized as you swipe your credit card. The specific transaction details will appear on your screen to verify. After verification, you can pay the amount and choose to email the receipt as proof of payment.
After successfully charging the payment, click the Close button on the EZRentOut charge payment overlay.
The square transaction ID along with the time and date will be shown on the order details page after the payment has been successful.
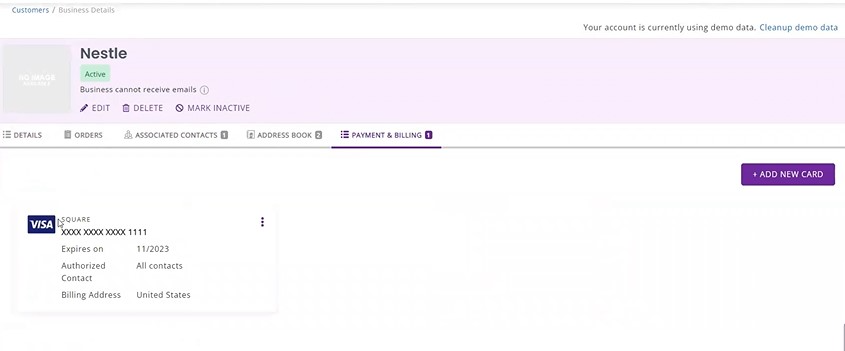
5. Add card details on the business details page
Go to the Payment and Billings tab on the business details page and click “Add new card”. An overlay will appear where you can choose Square as a payment gateway and add credit card information.
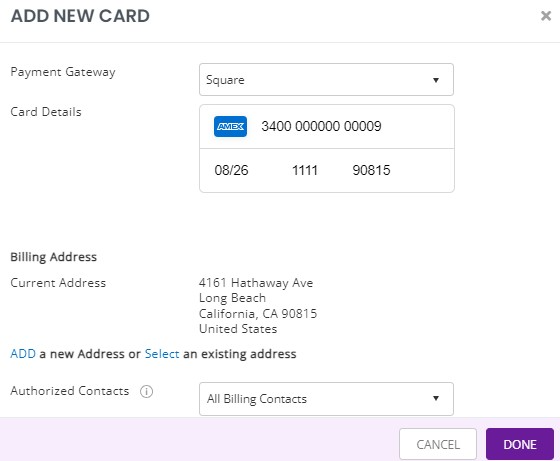
The saved card details along with the expiry date and authorized contacts can be viewed under the payment and billings tab.
Note: Multiple cards can be saved for a business whereas only one card can be saved for an individual customer.
Similarly, you can choose Square Terminal as a payment gateway and swipe your card on the terminal to save business card details. Go to the Payment and Billings tab on the business details page and click “Add new card”. An overlay will appear where you can choose Square Terminal as a payment gateway. Then, follow the same steps as mentioned in Section 4.1. above.
6. Use the Square payment gateway on the Webstore
On the Webstore, Add Items to Cart → Proceed to Checkout →Click Pay now. You will then be redirected to review the order details and add an amount to pay and payment details. For the payment options, you are requested to add card details as shown below:
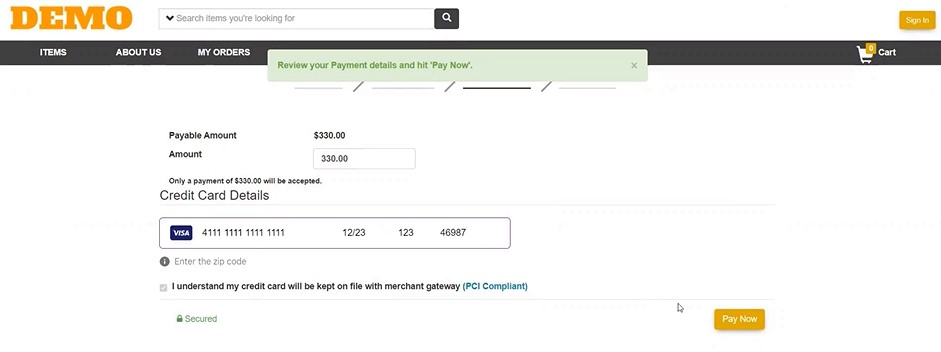
After you’ve added card and billing details, click the Pay Now button, and your payment is charged successfully.
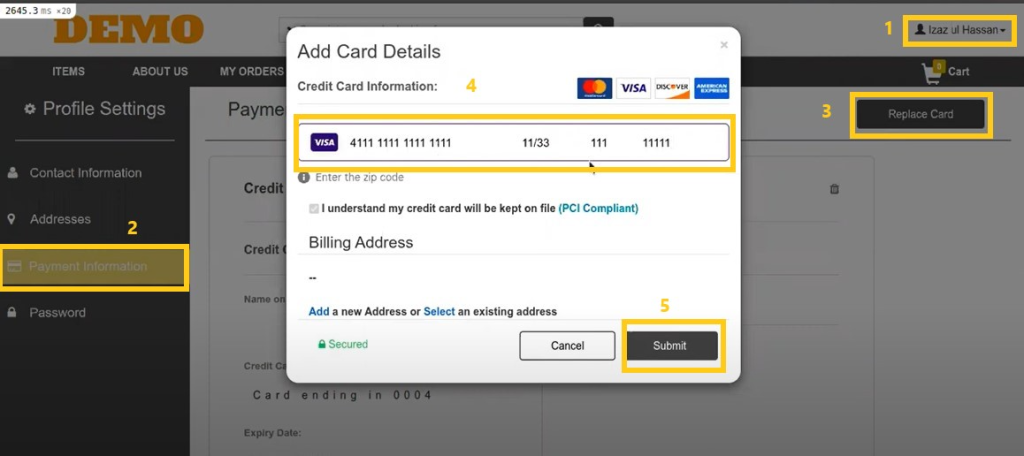
6.1. Add card details on the Webstore customer profile
Go to profile settings by clicking the customer name icon on the top right side of the webstore portal. Under profile settings, select the payment information tab and then click Add card. An overlay will appear to enter credit card details and billing information. Once saved, the card can seamlessly be used for webstore payments
About EZRentOut
EZRentOut, a cloud-based equipment rental software can help. EZRentOut offers companies in numerous industries seamless rental management along with a host of other features. You can integrate your website with our EZR plug to keep track of all your rental Assets and operations.


